NOTE: Make sure you’re checking out a branch at the beginning of each
section!
Building our master image
Now that we have a good base to inherit from, we can begin building out the rest
of our images inheriting from that one. The next image we need is for the master.
This image won’t contain too much other than generic configuration and a couple
tools because we want our master image itself to be as generic as possible. The
customization of each provisioned Jenkins master consists of configuration and
plugins which we will package in a separate image. We will talk more about why
it’s broken down this way later on. For now, let’s take a look at what we have
for a Jenkins master image (modernjenkins/jenkins-master):
images/jenkins-master/Dockerfile
# images/jenkins-master/Dockerfile
FROM modernjenkins/jenkins-base
MAINTAINER matt@notevenremotelydorky
LABEL dockerfile_location=https://github.com/technolo-g/modern-jenkins/tree/master/images/jenkins-master/Dockerfile \image_name=modernjenkins/jenkins-master \base_image=modernjenkins/jenkins-base
# Jenkins' Environment
ENV COPY_REFERENCE_FILE_LOG $JENKINS_HOME/copy_reference_file.log
# `/usr/share/jenkins/ref/` contains all reference configuration we want # to set on a fresh new installation. Use it to bundle additional plugins # or config file with your custom jenkins Docker image.
RUN mkdir-p /usr/share/jenkins/ref/init.groovy.d
# # Disable the upgrade banner & admin pw (we will add one later)
RUN echo 2.0 > /usr/share/jenkins/ref/jenkins.install.UpgradeWizard.state \&&echo 2.0 >${JENKINS_HOME}/jenkins.install.InstallUtil.lastExecVersion
# Fix up permissions
RUN chown-R${user}"$JENKINS_HOME" /usr/share/jenkins/ref
# Install our start script and make it executable# This script can be downloaded from# https://raw.githubusercontent.com/technolo-g/modern-jenkins/master/images/jenkins-master/files/jenkins.sh
COPY files/jenkins.sh /usr/local/bin/jenkins.sh
RUN chown jenkins /usr/local/bin/*&&chmod +x /usr/local/bin/*# Make our jobs dir ready for a volume. This is where job histories# are stored and we are going to use volumes to persist them
RUN mkdir-p${JENKINS_HOME}/jobs &&chown${user}:${group}${JENKINS_HOME}/jobs
# Install Docker (for docker-slaves plugin)
RUN yum-config-manager --add-repo\
https://download.docker.com/linux/centos/docker-ce.repo \&& yum makecache fast \&& yum install-y docker-ce \&& yum clean all -y# Switch to the Jenkins user from now own
USER ${user}# Configure Git
RUN git config --global user.email "jenkins@cicd.life"\&& git config --global user.name "CI/CD LIfe Jenkins"# Main web interface and JNLP slaves
EXPOSE 8080 50000
ENTRYPOINT ["/usr/local/bin/jenkins.sh"]
Looking at this Dockerfile, you may see a few new things like USER (will run
the commands after this declaration as the defined user) and EXPOSE (exposes
defined ports for binding to an outside port), but for the most part it’s very
similar to the previous one. Set a few ENV vars, RUN a few commands etc.
We need a build script so we’ll do the same thing that we did before (except
now we have the script in our repo) by creating a build.sh that can also push.
Let’s just duplicate this now:
PWD: ~/code/modern-jenkins/
cd images/jenkins-master
cp-rp ../jenkins-base/build.sh .
perl -pi-e's~jenkins-base~jenkins-master~g' build.sh
Now we have a nice little build script for this image too. While a puppy might
have died when we copy/pasta’d I didn’t hear it whimper.
There is one more file that we need for this image and it’s the startup script.
Since the internet was generous enough to provide one, we should just use it.
This is the script that powers the official image and I’ve got a copy of it just
for you in my repo. To retrieve it, use wget:
Now that we’ve got all the files created that our image depends on, let’s build
and test it a bit.
PWD: ~/code/modern-jenkins/
# Build itcd images/jenkins-master
./build.sh
# Run it
docker container run --rm-ti modernjenkins/jenkins-master bash
docker version
# You should see the Docker client version only
Commit, push, PR
The master image seems to be gtg so let’s get it integrated. You may now be
seeing what we mean by ‘continuous integration’. Every time we have a small
chunk of usable work, we integrate it into the master branch. This keeps
change sets small and makes it easier for everyone to incorporate the steady
stream of changes into their work without spending days in Git hell.
Note: I am assuming familiarity with Docker for this tutorial, but even if
you’ve never used it I think it should still be possible to follow along. It
always helps to know your tools though so if you’re unfamiliar take some time to
do a Docker Hello World or the like. It will be worth your investment in time as
we will be using this technology throughout the tutorial. Everything we will do
is based on Docker for Mac which you can download here:
https://www.docker.com/docker-mac Linux users
should be able to follow along without much adjustment too.
Building our Images
Well I think we’re fully setup with a great foundation at this point. We have
a general spec for the system we would like to create, we have a nicely
organized code repository hosted in GitHub and setup with a Grade A PR template
that will ensure we’re thinking about what we’re doing, and we have a workflow
that works for us and is reusable in any situation (nobody hates receiving PRs).
It is time to actually begin writing some code!
Nearly every software vendor provides a Docker image for their piece of software
which is super awesome when spiking things out or researching a new technology.
The reality of it is though that a lot of companies have a security requirement
that all software is vetted by the security team and then consumed from internal
repositories. These repositories are served up by tools such as Artifactory 1 and
feature built-in security scanning via Black Duck 2, permission models that allow
only certain users to publish, and promotion mechanisms for getting only
verifiable software into the environment. Pulling Docker images straight off of
the Hub does not fit into that model at all.
For that reason, we are going to develop a set of our own images with a common
base. This gives us commonality between images which has many benefits including
flexibility to add only the software that we want to. Now our examples will use
public servers for all of this activity, but you can substitute those URLs for
the URLs of your own internal artifact repository.
While we don’t want to trust every Docker image that has been published, we do
have to start our chain of trust somewhere. In our case we will start with the
CentOS 7 base image from the Docker Hub. There are lots of other great options
out there, such as Alpine and Ubuntu, but I think CentOS is perfectly fine for
this application and is what I use on a daily basis due to certain requirements.
modernjenkins/jenkins-base
This image contains purely the JDK. Since we decided to base this image on
CentOS (for security, support, compatibility, and reliability to name a few
reasons) that is where our chain of trust begins. I personally have been
trusting CentOS DVDs for an extremely long time so I feel confident they are a
good place to start. On top of the Centos 7 base we will install the OpenJDK and
setup a few environment vars. Let’s show the whole file and then talk about
what each of the sections are.
images/jenkins-base/Dockerfile
# images/jenkins-base/Dockerfile
FROM centos:7
MAINTAINER matt@notevenremotelydorky
LABEL dockerfile_location=https://github.com/technolo-g/modern-jenkins/tree/master/images/jenkins-base/Dockerfile \image_name=modernjenkins/jenkins-base \base_image=centos:7
# Jenkins' Environment
ENV JENKINS_HOME /var/jenkins_home
ENV JENKINS_ROOT /usr/share/jenkins
ENV JENKINS_WAR /usr/share/jenkins/ref/warfile/jenkins.war
ENV JENKINS_SLAVE_AGENT_PORT 50000
ENV user=jenkins
ENV group=jenkins
ENV uid=1000
ENV gid=1000
# Jenkins Version info
ENV JENKINS_VERSION 2.69
ENV JENKINS_SHA d1ad00f4677a053388113020cf860e05a72cef6ee64f63b830479c6ac5520056
# These URLs can be swapped out for internal repos if needed. Secrets required may vary :)
ENV JENKINS_UC https://updates.jenkins.io
ENV JENKINS_URL http://mirrors.jenkins.io/war/${JENKINS_VERSION}/jenkins.war
# Jenkins is run with user `jenkins`, uid = 1000# If you bind mount a volume from the host or a data container,# ensure you use the same uid
RUN groupadd -g${gid}${group}\&& useradd -d"$JENKINS_HOME"-u${uid}-g${group}-s /bin/bash ${user}# Install our tools and make them executable
COPY files/jenkins-support /usr/local/bin/jenkins-support
RUN mkdir-p${JENKINS_ROOT}
RUN chown jenkins /usr/local/bin/*${JENKINS_ROOT}\&&chmod +x /usr/local/bin/*# Configure to Denver timezone. I dislike debugging failures in UTC
RUN unlink /etc/localtime &&ln-s /usr/share/zoneinfo/America/Denver /etc/localtime
# Install Java, Git, and Unzip
RUN yum install-y java-1.8.0-openjdk-devel tzdata-java git unzip \&& yum clean all
The above Dockerfile will be our base image that everything else will inherit
from. While we are initially only creating a single Jenkins master, you may find
that others in your organization would like their own Jenkins instance and this
pattern ensures you’re ready for it without sacrificing readability. Now let’s
talk about what is in this Dockerfile.
Metadata
# images/jenkins-base/Dockerfile
FROM centos:7
MAINTAINER matt@notevenremotelydorky
LABEL dockerfile_location=https://github.com/technolo-g/modern-jenkins/tree/master/images/jenkins-base/Dockerfile \image_name=modernjenkins/jenkins-base \base_image=centos:7
This information is critical when tracking down a source in the supply chain as
well as for new contributors who want to change how the container works.
# comment at the top is just the path within the repo to the file itself
FROM defines the image that we are building on top of
MAINTAINER tells who the maintainer of this image is
LABEL section provides labels that can be accessed with docker inspect
These environment variables values that we want to have permanently baked into
the image. They will be available in any container that is instantiated from
this image or any other that inherits it. These types of variables make it easy
to bring consistency across the environment.
Files & Commands (Actually doing the work)
RUN groupadd -g${gid}${group}\&& useradd -d"$JENKINS_HOME"-u${uid}-g${group}-s /bin/bash ${user}# Install our tools and make them executable
COPY files/jenkins-support /usr/local/bin/jenkins-support
...
These steps actually modify our image by installing software, modifying the
filesystem, adding files from the build context, etc. They can use the ENV vars
set above or arguments passed in as well as all other kinds of manipulations.
You can see all the possible commands here:
https://docs.docker.com/engine/reference/builder/
Adding the jenkins-support file to the repo
We depend on a file called jenkins-support to make things work correctly. It is
basically a shim to get Jenkins working within a Docker container properly. It
cant be downloaded from my repo like so:
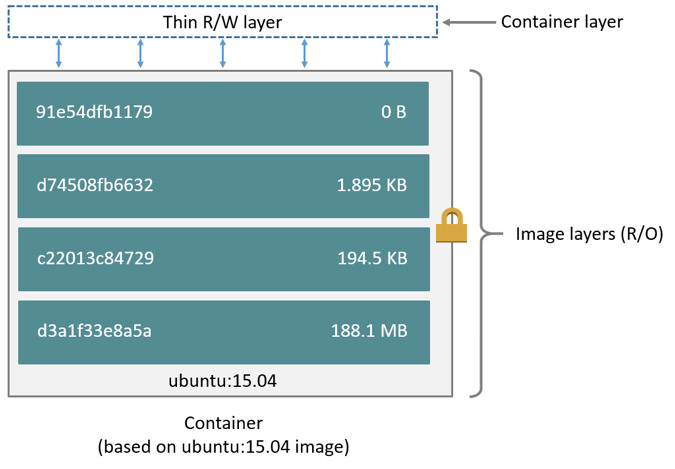
Each line in a Dockerfile creates a layer and then all of these layers are
mushed together (or was it squished?) to make our root fs. This mushing process
is only ever additive so what that means is if you create a big file in one
RUN step but then remove it in another RUN step, you’re not actually going
to see any difference in image size. The key is finding the right balance
between number of layers and size of layers. If we can keep layers under 50mb
but still split up our logical process into easily understood and intuitive
blocks (ie: doing a full yum transaction in one RUN block) then we’re sittin’
pretty.
From the Docker website
There is so much more I would like to tell you about best practices that I’ve
found around image creation that I will have to save it for another post. Just
know for now, we can never delete data that was created in a previous layer.
That will directly translate into cleaning up after yourself in an atomic
action. A real example is this:
# Install Java, Git, and Unzip then cleanup
RUN yum install-y java-1.8.0-openjdk-devel tzdata-java git unzip \&& yum clean all
Building the image
Now that we have a super awesome Dockerfile, we need to build it. Normally I
would have you do docker image build -t blah/boring . etc., but today I’m going to
set your future self up for a win. We’re going to write a script right off
the bat to build this thing. I promise you that you will be rebuilding this
image at least 2 more times so let’s just go ahead and script it from the get go.
images/jenkins-base/build.sh
#!/bin/bash -el# images/jenkins-base/build.sh# Define our image nameimage_name=modernjenkins/jenkins-base:latest
# Accept any args passed and add them to the command
docker image build ${@}-t$image_name$(dirname--"$0")# If we add PUSH=true to the command, it will push to the hubif["$PUSH"=true];then
docker image push $image_namefi
This will not be the last time we see this lil’ guy as we will add it to all of
the image repos. Some may say “That’s not DRY Matt!”, to which I say
“Suck a lemon!”. This code will never change and know that you can
cd images/blah && ./build.sh really makes it easy and convenient to work with
these images. Now we run the script and out pops a baby Docker :)
PWD: ~/code/modern-jenkins
cd images/jenkins-base
chmod +x ./build.sh # Gotta set executable perms
./build.sh
# ...# profit!
yey! You’ve built your first Docker image (for this project)!
Testing the image
We can now go ahead and give this image a quick spin. It won’t be too exciting,
but we can probably run the standard test to see that Java is installed:
PWD: ~/code/modern-jenkins
# Run the container and pop yourself into a shell
docker run --rm-ti modernjenkins/jenkins-base bash
# Check for java
java --version# damn
java --help# ugh
java version
# wtf! oh right...
java -version
openjdk version "1.8.0_141"
OpenJDK Runtime Environment (build 1.8.0_141-b16)
OpenJDK 64-Bit Server VM (build 25.141-b16, mixed mode)
Commit and push
OK, so now that we have a nice working image, this seems like a perfect place to
call shippable increment. Let’s commit to our branch, push it to origin, clean
up any erroneous commits by squashing.
, and create a PR. We will then self review it, confirm everything looks up to
snuff, and merge. Then a nice little git pull should get us all up to date
locally and we can begin work on the next increment.
PWD: ~/code/modern-jenkins/
git checkout -b feat-add_jenkins-base_image
git add .
git commit -m"Add a base image containing OpenJDK 8"
git push origin feat-add_jenkins-base_image
Now that we have a good idea of what the desired traits and abilities of our
system should be, we can begin to lay down the foundation. The very beginnings
of all projects start with a SCM (source control management) repository.
Multi or single repo?
We want our repo to be intuitively laid out as there is the chance that almost
every engineer in the company will need to interact with it at some point. This
means that we should separate concerns within the tree and make things easy
to find. In the past we tended to use a lot of separate repos and to treat them
as if they were fully independent and could be shared with any other team as is.
I am a fan of this idea for certain use cases, but what I have found is that it
makes things very hard to find on a system that you contribute to infrequently.
I prefer instead to start out with a mono-repo and if there comes a time in which
we need to break it up, do it then. Making a bunch of different repos for a project
like this right off the bat is a premature optimization IMO.
NOTE:
I’m going to treat this as a tutorial so you should be able to follow along by
running what’s in the code blocks
Flesh out the repo structure
First let’s make sure that we have a repo to work on setup in GitHub. You should
be able to do this for free as GitHub allows unlimited open source projects. Once
we get to the point of configuring our deployment, we will add some encryption to
cover the secret data.
Create the repo and populate the master branch
Create an account on GitHub 1 if you do not have one already. GitHub is the
worlds largest hub for sharing code and lots of companies use it as their
primary SCM host with either their public or on-premise offering. We will be storing
everything we do in this tutorial on GitHub. You can sign up for free (no
credit card needed) here: https://github.com/join
NOTE: Don’t check the “Initialize this repo with a README” button.
You can name it anything you want, but I have named mine modern-jenkins. Clone
this somewhere locally (I use ~/code for all of my repos) and let’s begin
initializing the repo. I prefer to start with an empty commit when creating a
new repo as we can then PR everything that ever hits the master branch. You
can do this like so:
# Setup your Git author information first:
git config --global user.email matt@notevenremotelydorky.com
git config --global user.name "Matt Bajor"# Navigate to your code directorycd ~/code
# I have created a Github project here:# https://github.com/technolo-g/modern-jenkins
git clone git@github.com:technolo-g/modern-jenkins.git
cd modern-jenkins
# Populate the master branch. This will be our first and ONLY commit directly to# master. Everything else will go through a Pull Request
git commit --allow-empty-m"Initial Commit"
git push origin master
We will be using GitHub Flow 2 to work with our repo. Visit the link if you
want to get a good idea of how it works, but the gist of it is that the master
branch is where stable code lives. It should always be releasable. When we
want to make a change, we will create a feature branch, make changes, then Pull
Request 3 the changes back into master. Since the branches only live until
the change is merged into master, they are considered to be “short lived”. There
are some other workflows such as Git Flow 4 that work differently
with “long lived” branches and other workflows, but they can lead to
more of a headache with large, long running projects in my experience.
Our workflow will be:
Cut a feature branch off of master
Make changes to the branch to implement the feature
Push your changes to the remote (GitHub)
Create a Pull Request to merge your changes into master
(self-)Review the changes and comment and/or approve
Merge changes into master and delete the feature branch
Pull the new master locally
Create repo skeleton
Let’s begin creating our repo!
PWD: ~/code/modern-jenkins/
# Starting from our empty master, checkout a feature branch
git checkout -b feat-repo_skeleton
# Create a base readmeecho'# Dockerized Jenkins Build System'> README.md
# Create a place for our imagesmkdir-p images/ &&echo'# Docker Images'> images/README.md
# Create a place for our deployment configmkdir-p deploy/ &&echo'# Deployment Scripts'> deploy/README.md
# A spot for the DSLmkdir-p dsl/ &&echo'# Jenkins Job DSL'> dsl/README.md
Add a PULL_REQUEST_TEMPLATE
Whenever we change the master branch we will be submitting a Pull Request
against the repo. GitHub gives you the ability to template the contents of
the Pull Request form. Since we’re probably working by ourselves here, you
may wonder “WTH Matt, why are we setting up collaboration tools when I’m clearly
doing this tutorial by myself?” There are a couple of reasons:
Get used to the process: As the system evolves and as it grows there
will be more and more people adding to this repo. If we start off pushing
to master it’s much easier to continue that tradition and end up with
everyone pushing to master all willy nilly. If we start off with a robust
process, it has a habit of sticking around.
Fighting complacency: Since we’ll be self-reviewing most of this code,
it can be really easy to just click ‘Merge’ without thinking of what you’re
doing. This PR template has a small checklist that will keep you honest
with yourself. If you know you have a tendency to skip over something go
go ahead and add that to the checklist too.
Change management: Going from working app to working app requires
keeping an eye on what’s changing whenever they change. When things do go
awry (and they will), PRs will help untangle the mess much quicker than a
steady stream of commits to the master branch. In theory, it is much easier
to tell when a PR breaks a repo instead of a single commit in the history.
Thinking about your work in chunks: We really will be adding just a set
of commits to a repo to get to our final form, but if we treat our work
like that it’s never done. Instead, we should think about small chunks of
work that bring value and can be deployed as a whole. Agile calls this a
releasable increment. These chunks should make it easier to reason about
what impact the change may have.
Even if I haven’t convinced you that this is important, I’m going to put it in
a code block which will force your hand anyways. Ha!
PULL_REQUEST_TEMPLATE.md
cat<<EOF > PULL_REQUEST_TEMPLATE.md
#### What does this PR do?
#### Why did you take this approach?
#### Contribution checklist
- [ ] The branch is named something meaningful
- [ ] The branch is rebased off of current master
- [ ] There is a single commit (or very few smaller ones) with a [Good commit message](https://github.com/torvalds/subsurface-for-dirk/blob/master/README#L92) that includes the issue if there was one
- [ ] You have tested this locally yourself
#### A picture of a cute animal (optional)
<img src="https://68.media.tumblr.com/7b36a31855ed619f91b8fc4416d0cafc/tumblr_inline_o6b4ngEE551sdwbtb_540.png" width="350"/>
EOF
Integrating our changes into master
Now that we have a layout we like and a fancy new PR template, let’s get them
into the master branch. We will do this via PR.
PWD: ~/code/modern-jenkins/
# Add the changes to our branch
git add .
git commit -m"Create initial repo structure and boilerplate"
git push origin feat-repo_skeleton
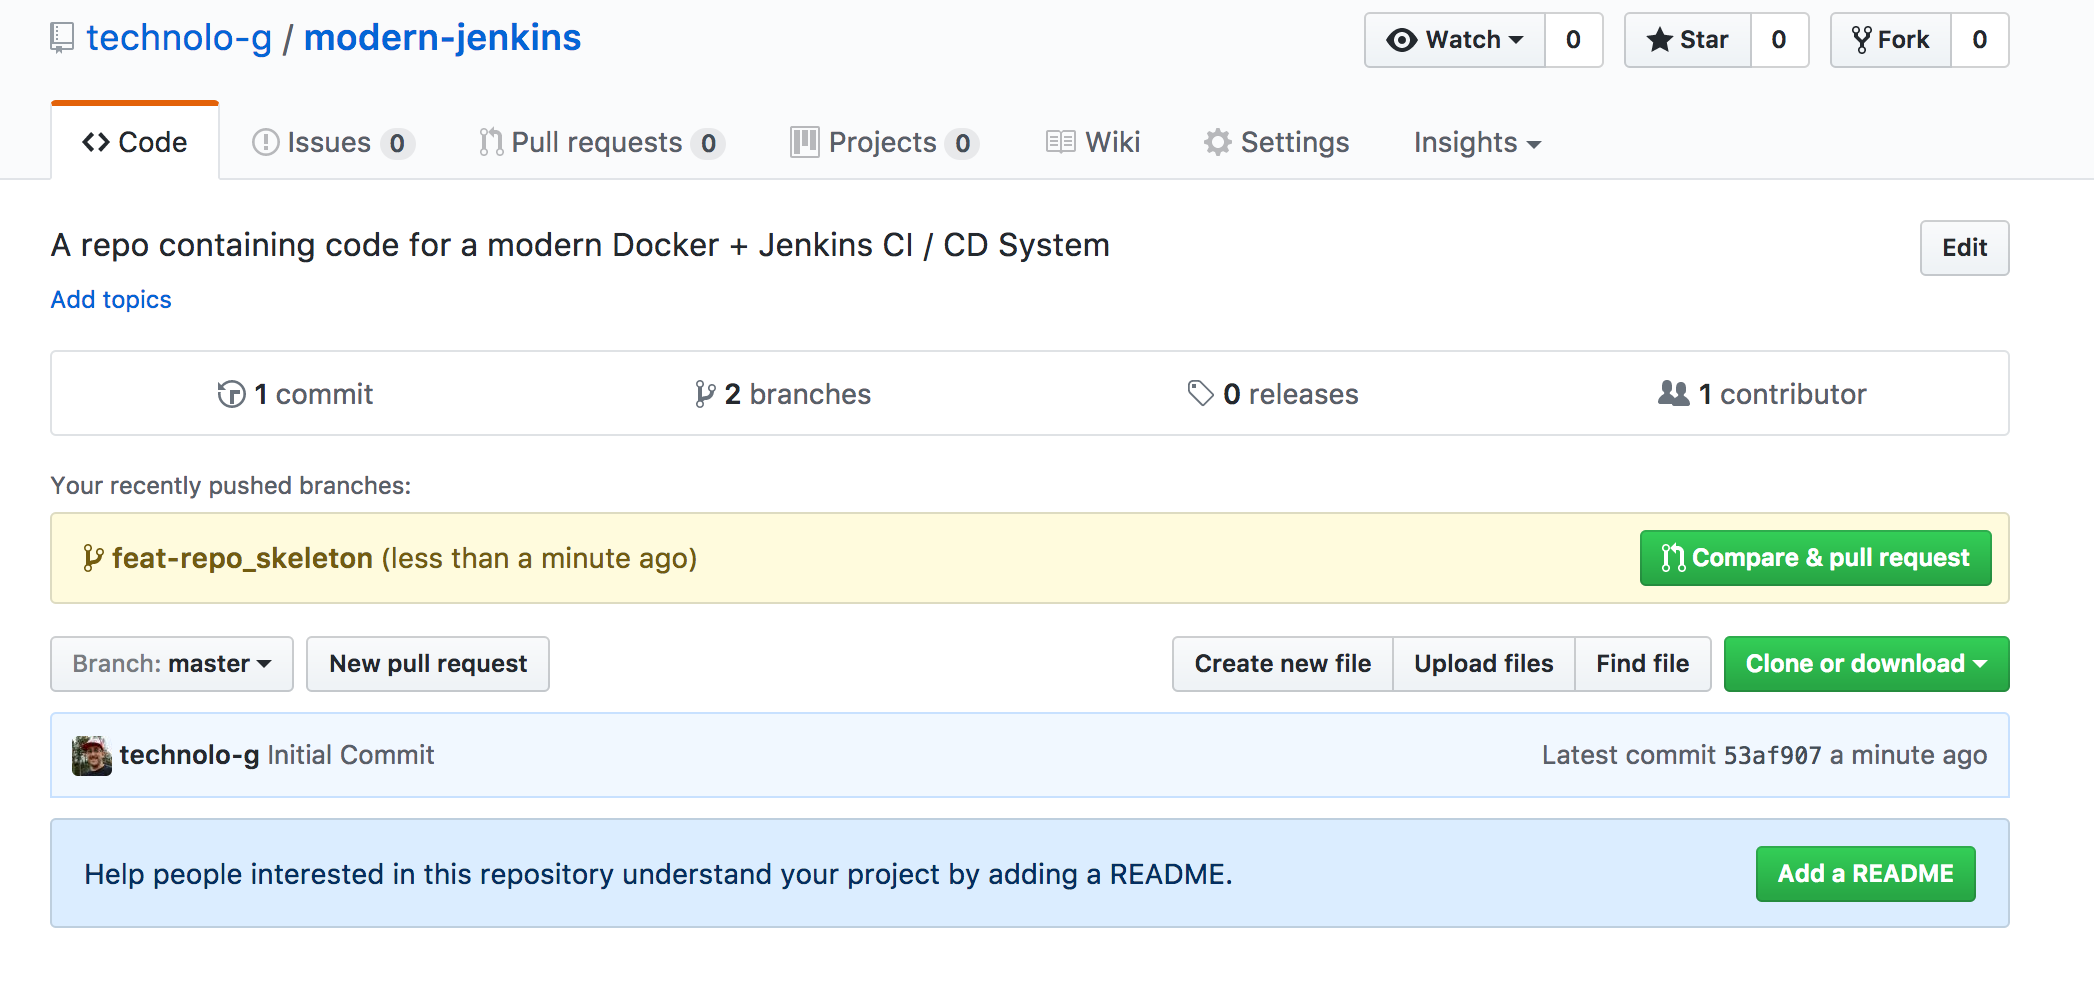
Now that the changes are pushed up, browse to your repo in your favorite web
browser. Mine is located at
https://github.com/technolo-g/modern-jenkins.
You should see a green button that says “Compare & Pull Request”:
Click that and
it will take you to a form that allows you to set the title of the PR as well as
a description. Enter both and click “Create Pull Request”. Feel free to describe
exactly what you’re doing and why. It’ good practice ;)
Once it has been submitted, you can then view the changeset, comment on it if
you like (don’t feel bad talking to yourself), and approve or modify the PR.
Since this guy is pretty simple, take a quick look through your commit and make
sure there are no typos etc. If all looks good, give er’ a ‘LGTM’ in the comments
section and merge away.
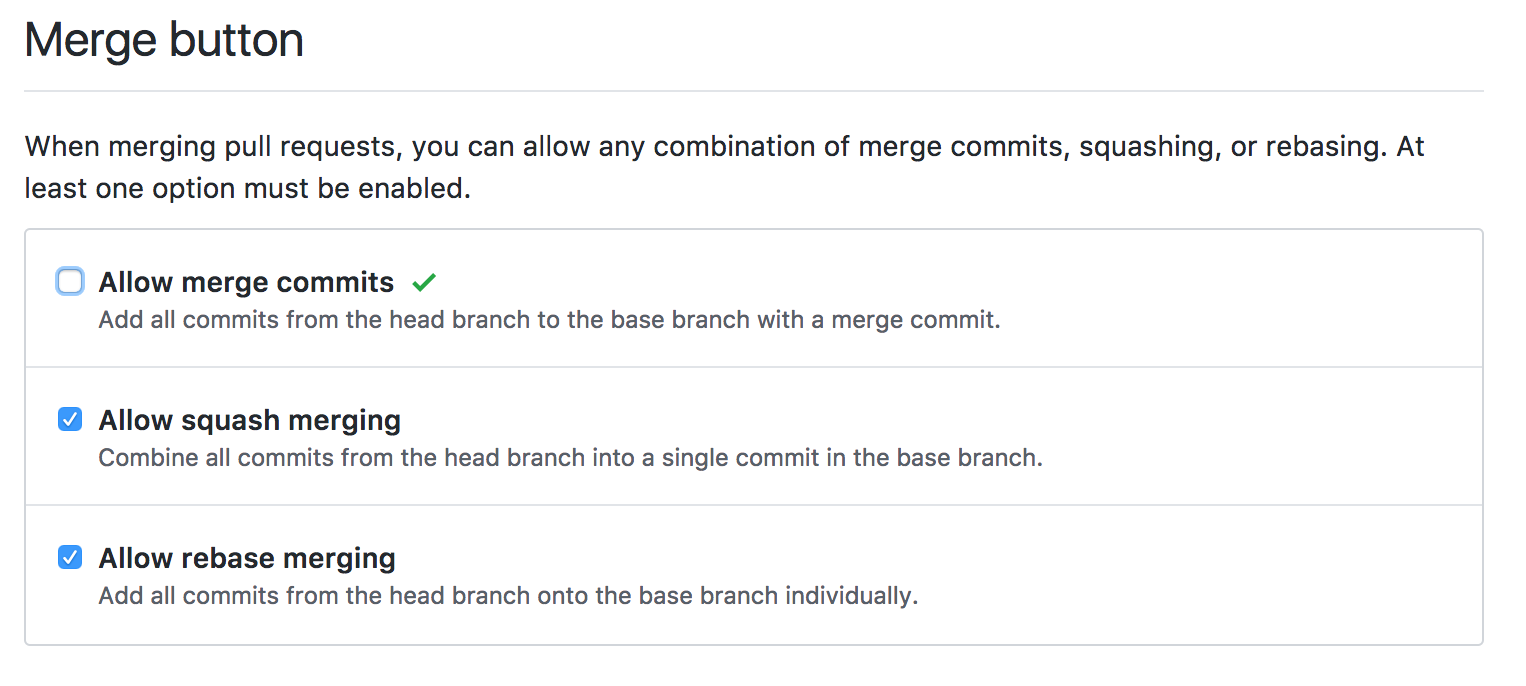
NOTE: I always recommend disabling merge commits in a repo’s settings. These
just muddy up the commit history and instead I prefer to use the
“Squash Merging” setting instead.
This will squash all commits in the PR down to
one and will allow you to edit the commit message before doing so. This really
makes rebases and other git surgery easier than when there are a ton of merge
commits to wade through. You can also do this before creating the PR if you like.
See my post here on cleaning up your git history.
Sweet! You have made your first change on a road of many and you have done it in
a very sustainable way that gives everyone working on the project context of
what you’re doing and why. Most importantly, you’ve given your future self some
really good reminders as to what you were thinking at the time the change was made.


 This will squash all commits in the PR down to
one and will allow you to edit the commit message before doing so. This really
makes rebases and other git surgery easier than when there are a ton of merge
commits to wade through. You can also do this before creating the PR if you like.
See my post here on
This will squash all commits in the PR down to
one and will allow you to edit the commit message before doing so. This really
makes rebases and other git surgery easier than when there are a ton of merge
commits to wade through. You can also do this before creating the PR if you like.
See my post here on