
Storage + Process
Now that we have a good idea of what the desired traits and abilities of our system should be, we can begin to lay down the foundation. The very beginnings of all projects start with a SCM (source control management) repository.

Multi or single repo?
We want our repo to be intuitively laid out as there is the chance that almost every engineer in the company will need to interact with it at some point. This means that we should separate concerns within the tree and make things easy to find. In the past we tended to use a lot of separate repos and to treat them as if they were fully independent and could be shared with any other team as is. I am a fan of this idea for certain use cases, but what I have found is that it makes things very hard to find on a system that you contribute to infrequently. I prefer instead to start out with a mono-repo and if there comes a time in which we need to break it up, do it then. Making a bunch of different repos for a project like this right off the bat is a premature optimization IMO.
NOTE:
I’m going to treat this as a tutorial so you should be able to follow along by running what’s in the code blocks
Flesh out the repo structure
First let’s make sure that we have a repo to work on setup in GitHub. You should be able to do this for free as GitHub allows unlimited open source projects. Once we get to the point of configuring our deployment, we will add some encryption to cover the secret data.
Create the repo and populate the master branch

Create an account on GitHub 1 if you do not have one already. GitHub is the worlds largest hub for sharing code and lots of companies use it as their primary SCM host with either their public or on-premise offering. We will be storing everything we do in this tutorial on GitHub. You can sign up for free (no credit card needed) here: https://github.com/join
and the creating your first public repo:
NOTE: Don’t check the “Initialize this repo with a README” button.
You can name it anything you want, but I have named mine modern-jenkins. Clone
this somewhere locally (I use ~/code for all of my repos) and let’s begin
initializing the repo. I prefer to start with an empty commit when creating a
new repo as we can then PR everything that ever hits the master branch. You
can do this like so:
# Setup your Git author information first:
git config --global user.email matt@notevenremotelydorky.com
git config --global user.name "Matt Bajor"

# Navigate to your code directory
cd ~/code

# I have created a Github project here:
# https://github.com/technolo-g/modern-jenkins
git clone git@github.com:technolo-g/modern-jenkins.git
cd modern-jenkins

# Populate the master branch. This will be our first and ONLY commit directly to
# master. Everything else will go through a Pull Request
git commit --allow-empty -m "Initial Commit"
git push origin master
Begin with our GitHub Flow workflow
https://guides.github.com/introduction/flow/
We will be using GitHub Flow 2 to work with our repo. Visit the link if you
want to get a good idea of how it works, but the gist of it is that the master
branch is where stable code lives. It should always be releasable. When we
want to make a change, we will create a feature branch, make changes, then Pull
Request 3 the changes back into master. Since the branches only live until
the change is merged into master, they are considered to be “short lived”. There
are some other workflows such as Git Flow 4 that work differently
with “long lived” branches and other workflows, but they can lead to
more of a headache with large, long running projects in my experience.
Our workflow will be:
- Cut a feature branch off of master
- Make changes to the branch to implement the feature
- Push your changes to the remote (GitHub)
- Create a Pull Request to merge your changes into master
- (self-)Review the changes and comment and/or approve
- Merge changes into master and delete the feature branch
- Pull the new master locally
Create repo skeleton
Let’s begin creating our repo!
PWD: ~/code/modern-jenkins/
# Starting from our empty master, checkout a feature branch
git checkout -b feat-repo_skeleton

# Create a base readme
echo '# Dockerized Jenkins Build System' > README.md

# Create a place for our images
mkdir -p images/ && echo '# Docker Images' > images/README.md

# Create a place for our deployment config
mkdir -p deploy/ && echo '# Deployment Scripts' > deploy/README.md

# A spot for the DSL
mkdir -p dsl/ && echo '# Jenkins Job DSL' > dsl/README.md
Add a PULL_REQUEST_TEMPLATE
Whenever we change the master branch we will be submitting a Pull Request against the repo. GitHub gives you the ability to template the contents of the Pull Request form. Since we’re probably working by ourselves here, you may wonder “WTH Matt, why are we setting up collaboration tools when I’m clearly doing this tutorial by myself?” There are a couple of reasons:
-
Get used to the process: As the system evolves and as it grows there will be more and more people adding to this repo. If we start off pushing to master it’s much easier to continue that tradition and end up with everyone pushing to master all willy nilly. If we start off with a robust process, it has a habit of sticking around.
-
Fighting complacency: Since we’ll be self-reviewing most of this code, it can be really easy to just click ‘Merge’ without thinking of what you’re doing. This PR template has a small checklist that will keep you honest with yourself. If you know you have a tendency to skip over something go go ahead and add that to the checklist too.
-
Change management: Going from working app to working app requires keeping an eye on what’s changing whenever they change. When things do go awry (and they will), PRs will help untangle the mess much quicker than a steady stream of commits to the master branch. In theory, it is much easier to tell when a PR breaks a repo instead of a single commit in the history.
-
Thinking about your work in chunks: We really will be adding just a set of commits to a repo to get to our final form, but if we treat our work like that it’s never done. Instead, we should think about small chunks of work that bring value and can be deployed as a whole. Agile calls this a releasable increment. These chunks should make it easier to reason about what impact the change may have.
Even if I haven’t convinced you that this is important, I’m going to put it in a code block which will force your hand anyways. Ha!
PULL_REQUEST_TEMPLATE.md
cat <<EOF > PULL_REQUEST_TEMPLATE.md
#### What does this PR do?

#### Why did you take this approach?

#### Contribution checklist

- [ ] The branch is named something meaningful
- [ ] The branch is rebased off of current master
- [ ] There is a single commit (or very few smaller ones) with a [Good commit message](https://github.com/torvalds/subsurface-for-dirk/blob/master/README#L92) that includes the issue if there was one
- [ ] You have tested this locally yourself


#### A picture of a cute animal (optional)
<img src="https://68.media.tumblr.com/7b36a31855ed619f91b8fc4416d0cafc/tumblr_inline_o6b4ngEE551sdwbtb_540.png" width="350"/>
EOF
Integrating our changes into master
Now that we have a layout we like and a fancy new PR template, let’s get them into the master branch. We will do this via PR.
PWD: ~/code/modern-jenkins/
# Add the changes to our branch
git add .
git commit -m "Create initial repo structure and boilerplate"
git push origin feat-repo_skeleton
Now that the changes are pushed up, browse to your repo in your favorite web browser. Mine is located at https://github.com/technolo-g/modern-jenkins. You should see a green button that says “Compare & Pull Request”:
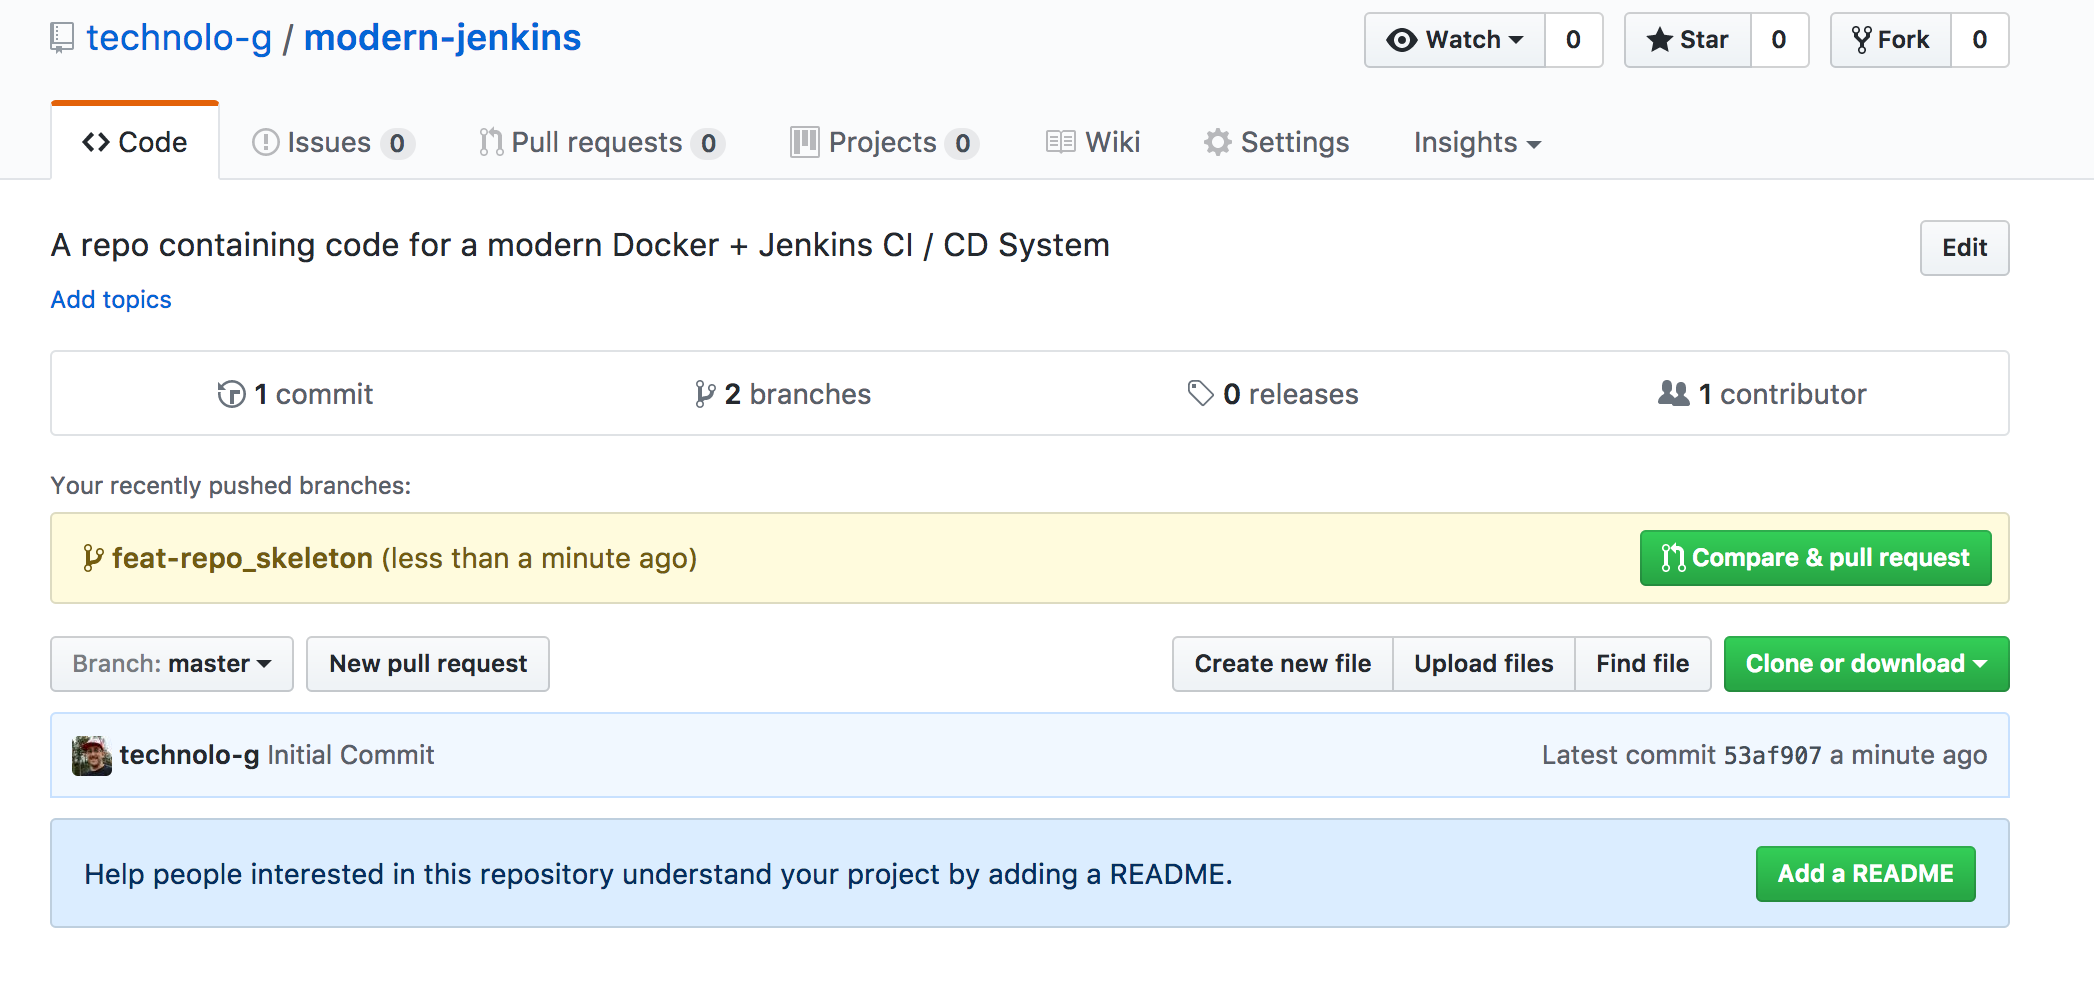
Click that and it will take you to a form that allows you to set the title of the PR as well as a description. Enter both and click “Create Pull Request”. Feel free to describe exactly what you’re doing and why. It’ good practice ;)
Once it has been submitted, you can then view the changeset, comment on it if you like (don’t feel bad talking to yourself), and approve or modify the PR. Since this guy is pretty simple, take a quick look through your commit and make sure there are no typos etc. If all looks good, give er’ a ‘LGTM’ in the comments section and merge away.
NOTE: I always recommend disabling merge commits in a repo’s settings. These
just muddy up the commit history and instead I prefer to use the
“Squash Merging” setting instead.
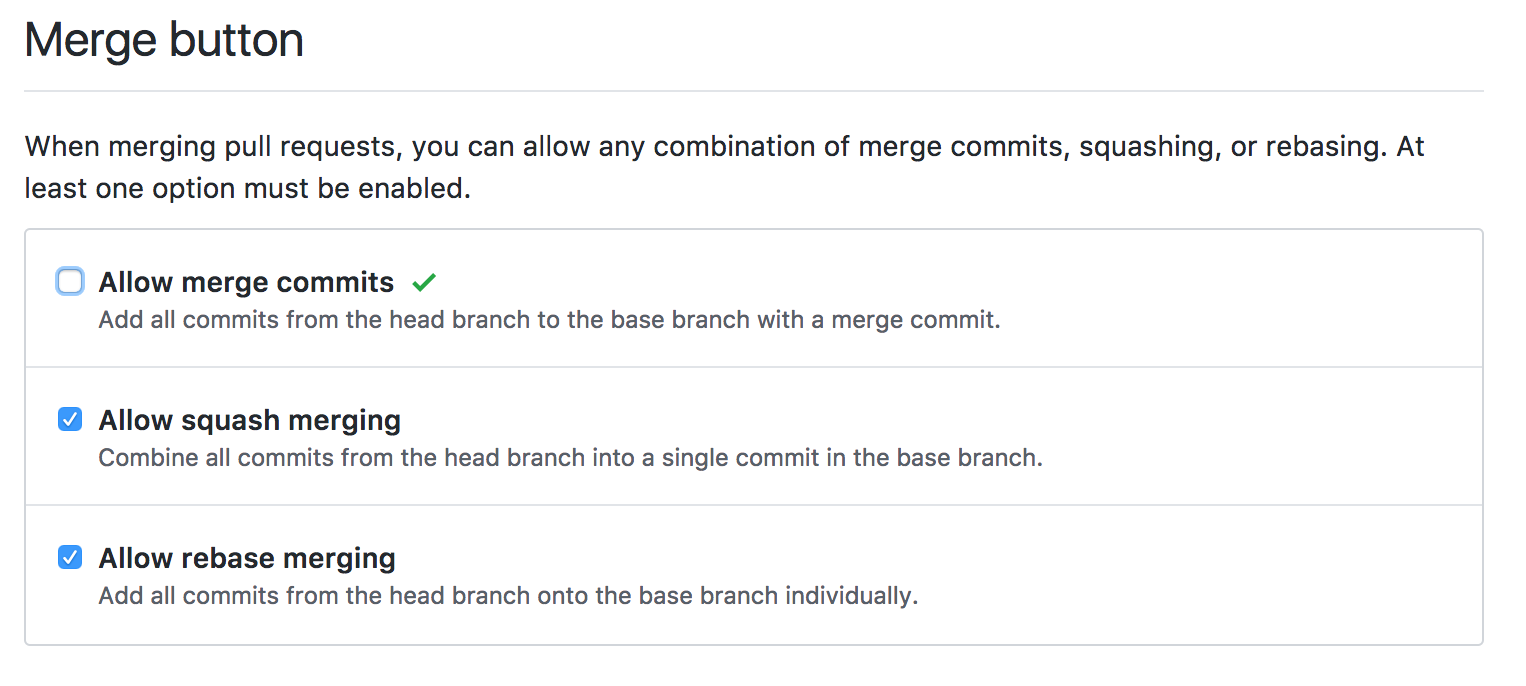 This will squash all commits in the PR down to
one and will allow you to edit the commit message before doing so. This really
makes rebases and other git surgery easier than when there are a ton of merge
commits to wade through. You can also do this before creating the PR if you like.
See my post here on cleaning up your git history.
This will squash all commits in the PR down to
one and will allow you to edit the commit message before doing so. This really
makes rebases and other git surgery easier than when there are a ton of merge
commits to wade through. You can also do this before creating the PR if you like.
See my post here on cleaning up your git history.
Sweet! You have made your first change on a road of many and you have done it in a very sustainable way that gives everyone working on the project context of what you’re doing and why. Most importantly, you’ve given your future self some really good reminders as to what you were thinking at the time the change was made.
On to the next chapter!
Now that we have our skeleton there, let’s begin hashing out the actual stuff in
the repo :) If you need it, the code from this part can be found under the
unit2-part1 tag here:
https://github.com/technolo-g/modern-jenkins/tree/unit2-part1
Next Post: Building Jenkins’ base Docker image (and brief Intro to Docker)