Modern Jenkins Unit 3 / Part 4: Configuring the GitHub Jenkins Plugin

GitHub + Jenkins

Setting up the Jenkins <–> Git Interactions

One task that just about every build system needs to complete before doing anything is getting the code that it will be testing and packaging. For most software development shops in the world, this code is kept in a source code repository in a version control system (VCS). The most common implementation that I have been exposed to is Git. Linus Torvalds with a few kernel developers wrote the initial version of git while working on the kernel after BitKeeper’s copyright holder revoked free use1. Git is what powers GitHub (surprise, surprise) and is just about the most popular VCS out there. We are even using it to develop our Jenkins CI system!

In order to interact with GitHub, we are going to need a couple of things setup:

Bender Rodriguez

  • A machine user that can be managed independently of your customers
  • A SSH key secret in the credentials store
  • Configuration that says to use the credentials in the store for cloning

Once we have these in place we should be able to create a job that clones a repo and does something.

Creating a machine user

Teams of developers change constantly with people being added and removed from the roster quite frequently. To use credentials that are tied to a person is not good practice as it does not separate the actions of the user and the actions of the system. For this reason we will create our own machine user in GitHub and configure her to do the builds.

Note: Do not stage or commit anything during this step. We will be encrypting the sensitive files in the next step.

  • Browse to http://github.com/ in an Incognito window (we need to create a new account and you’re probably logged in).

  • Create an account for your machine user. It is not against GitHub’s T.O.S.2 to create a machine user, but it is to script this process. You can’t reuse your existing email, so you must have a secondary email setup for this user.

  • Verify the email and then browse to Settings in the upper right hand corner.

  • Fill out the info that makes sense and then head over to SSH and GPG Keys

  • We now need to create an ssh-key for the machine user. We will use a new type of key based on this article: https://blog.g3rt.nl/upgrade-your-ssh-keys.html


PWD: ~/code/modern-jenkins/

# cd into our secrets dir
cd secure

# Generate a ed25519 key in the new RFC4716 format with a random good passphrase.
# Something like: 't0$VQki3RWVim!K*rzA1' and then make sure to note the pw. We
# will be using it in a moment
ssh-keygen -o -a 100 -t ed25519 -f git-ssh-key.priv

# Rename the pubkey
mv git-ssh-key.priv.pub git-ssh-key.pub

# Record that passphrase we used to generate the key in secure/git-ssh-key.pw
vi git-ssh-key.pw

# Record the GitHub username for the user in git-ssh-key.user
echo "CICDLifeBuildBot" > git-ssh-key.user

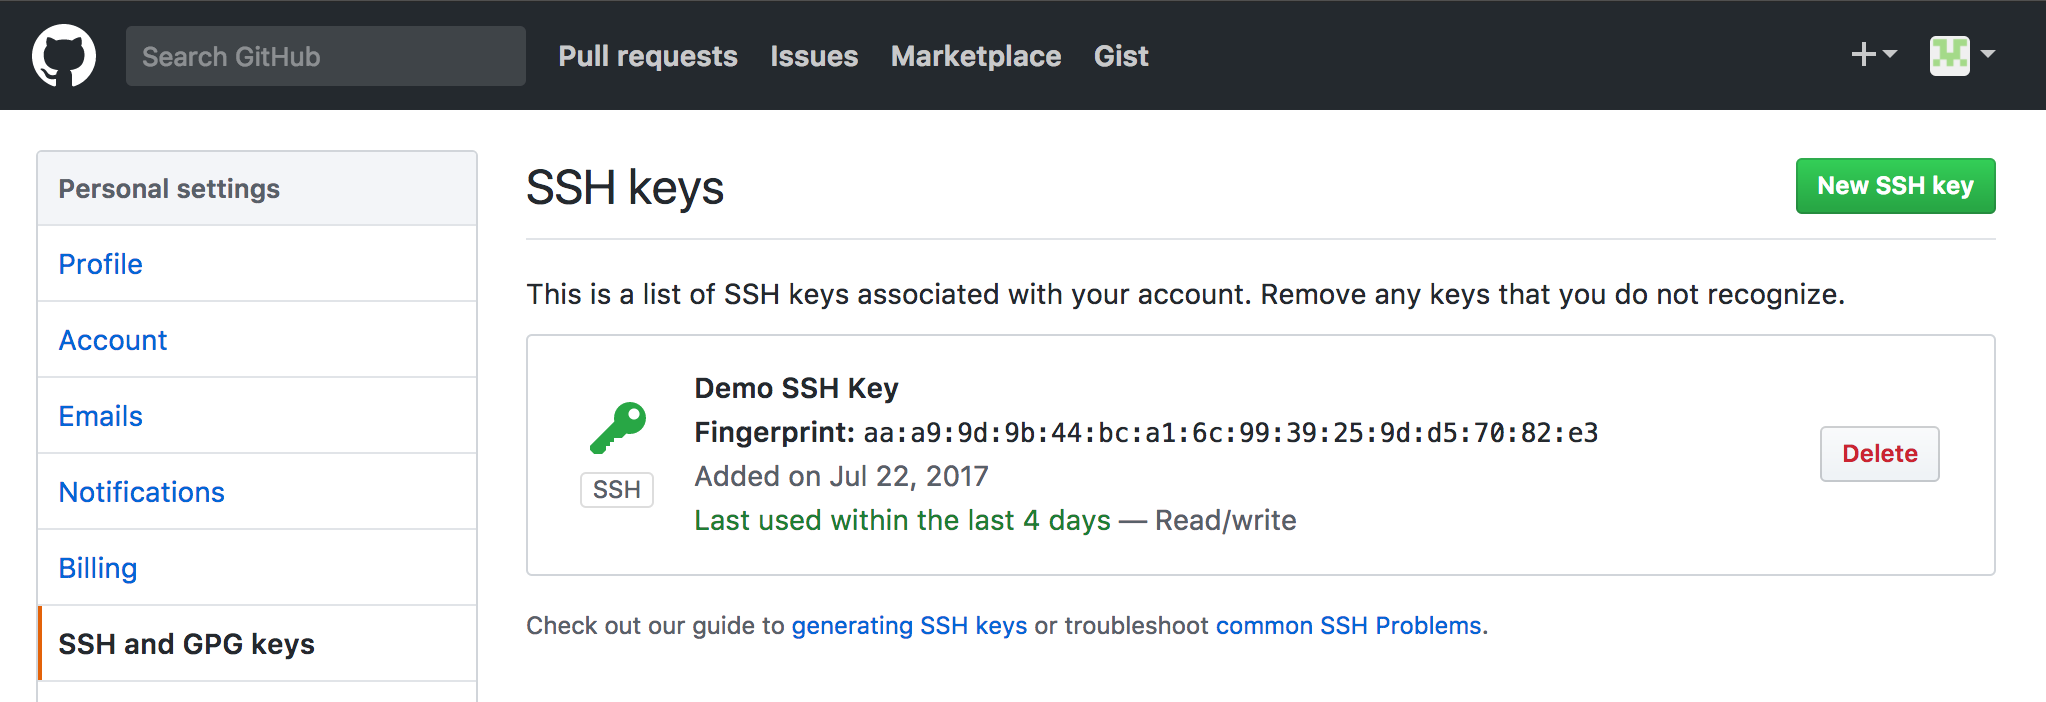
  • Now add the contents of git-ssh-key.pub to the SSH Keys in your GitHub Settings page with a good name. We now have a machine user and need to configure Jenkins to use it.
GitHub SSH Key

Add the secrets to the credential store

Add to Credential Store

Now that we have the Git credentials that should in theory work for cloning and pushing we need to get them added into the Jenkins credential store. How we will do this is via the init system Groovy and some Docker volume mounts.

Mount the secrets into the master container

Since we are still in development, let’s just add our secure dir to the compose file as a mount. When we get to prod we will change this up.


deploy/master/docker-compose.yml

...
#  # Jenkins master's configuration
#  master:
#    image: mastering-jenkins/jenkins-master
#    ports:
#      - "8080:8080"
#    volumes:
#      - plugins:/usr/share/jenkins/ref/plugins
#      - warfile:/usr/share/jenkins/ref/warfile
       - ${PWD}/../../secure:/secure:ro
#  
#  # Jenkins plugins configuration
#  plugins:
...

Restart the service using our script


PWD: ~/code/modern-jenkins/deploy/master

# Restart
./start.sh

# Confirm that the files have been mounted where we expect
docker exec -t master_master_1 ls /secure
#README.md  git-ssh-key.priv  git-ssh-key.pub  git-ssh-key.pw  git-ssh-key.user

Restarting the master will mount the directory ~/code/modern-jenkins/secure at /secure inside the container. Since we specified ro at the end of the VOLUME definition, the secrets themselves will be read-only. With the secrets loaded into the environment, we can begin developing a script that configures GitHub.

Writing Groovy to configure GitHub

Configuring Jenkins plugins with Groovy can seem to be more like an art than a science. Each plugin operates a little bit differently and since Jenkins has been so popular for so long, plugins are in all different states of repair. The basic gist of how to do any plugin is:

  • Read the values in from the filesystem or ENV that you need to configure
  • Get a handle on the configuration object for the plugin
  • Create a new instance of the configuration objects with the values you want
  • Update the main configuration with your newly created one
  • Save the config object

Any plugin can be configured this way and it’s normally a matter of familiarizing yourself with the plugin’s data models + classes enough to create what you need. Let’s take a look at the (well documented) Groovy script that configures our GitHub plugin.


URL: http://localhost:8080/script

images/jenkins-plugins/files/init.groovy.d/02-configure-github-client.groovy

// 02-configure-git-client.groovy
// Thanks to chrish:
// https://stackoverflow.com/questions/33613868/how-to-store-secret-text-or-file-using-groovy
import jenkins.model.*
import com.cloudbees.jenkins.plugins.sshcredentials.impl.*
import com.cloudbees.plugins.credentials.domains.*;
import com.cloudbees.plugins.credentials.*;


// Read our values into strings from the volume mount
privKeyText = new File('/secure/git-ssh-key.priv').text.trim()
passPhraseText = new File('/secure/git-ssh-key.pw').text.trim()
sshUserText = new File('/secure/git-ssh-key.user').text.trim()

// Get a handle on our Jenkins instance
def jenkins = Jenkins.getInstance()

// Define the security domain. We're making these global but they can also
// be configured in a more restrictive manner. More on that later
def domain = Domain.global()

// Get our existing Credentials Store
def store = jenkins.getExtensionList(
  'com.cloudbees.plugins.credentials.SystemCredentialsProvider'
  )[0].getStore()

// Create a new BasicSSHUserPrivateKey object with our values
gitHubSSHKey = new BasicSSHUserPrivateKey(
  CredentialsScope.GLOBAL,
  "git-ssh-key",
  sshUserText,
  new BasicSSHUserPrivateKey.DirectEntryPrivateKeySource(privKeyText),
  passPhraseText,
  "GitHub Machine User SSH Creds"
)

// Add the new object to the credentials store
store.addCredentials(domain, gitHubSSHKey)

// Get the config descriptor for the overall Git config
def desc = jenkins.getDescriptor("hudson.plugins.git.GitSCM")

// Set the username and email for git interactions
desc.setGlobalConfigName("${sshUserText}")
desc.setGlobalConfigEmail("${sshUserText}@cicd.life")

// Save the descriptor
desc.save()

// Echo out (or log if you like) that we've done something
println("INFO: GitHub Credentials and Configuration complete!")

If things are setup and working right, you should see our INFO statement printed out below the console. To confirm it worked, browse to the credentials store confirm that we now have a SSH Key secret with the id of git-ssh-key. If you click on “Update” you should see the SSH key (don’t worry, it is armored and you can’t show the passphrase from here). While this is not 100% secure, it is still much better than baking the credentials into the image or a lot of other methods people use to expose secrets. Incremental improvements are what I always say!

Add the groovy to the Docker image

After confirming that the script works, add it to the plugins Docker image by dropping it in images/jenkins-plugins/files/init.groovy.d with the name of 02-configure-github-client.groovy. Then you can rebuild the image and restart the service to verify that everything is working on boot.


PWD: ~/code/modern-jenkins/

# Create images/jenkins-plugins/files/init.groovy.d/02-configure-github-client.groovy
# with the content from the script console.

# Build the image
./images/jenkins-plugins/build.sh

# Restart the service
cd deploy/master
./start.sh
docker-compose logs -f

Watch the log output from the containers to confirm that the scripts are running (the name of the scripts is output in the console out) and that there are no stack traces or other unexpected errors. When the system is fully up and running, browse to the GUI and check to see if the credential has been installed. I think you’ll be pleasantly surprised!

Testing our changes

We should in theory be able to test our changes by creating a tiny little job that just clones a repo. Follow me and we’ll give it a run for it’s money:

  • Browse to http://localhost:8080
  • Click New Item in the top left
  • Name it what you like, select freestyle project, and click OK. This will drop you at the configuration screen.
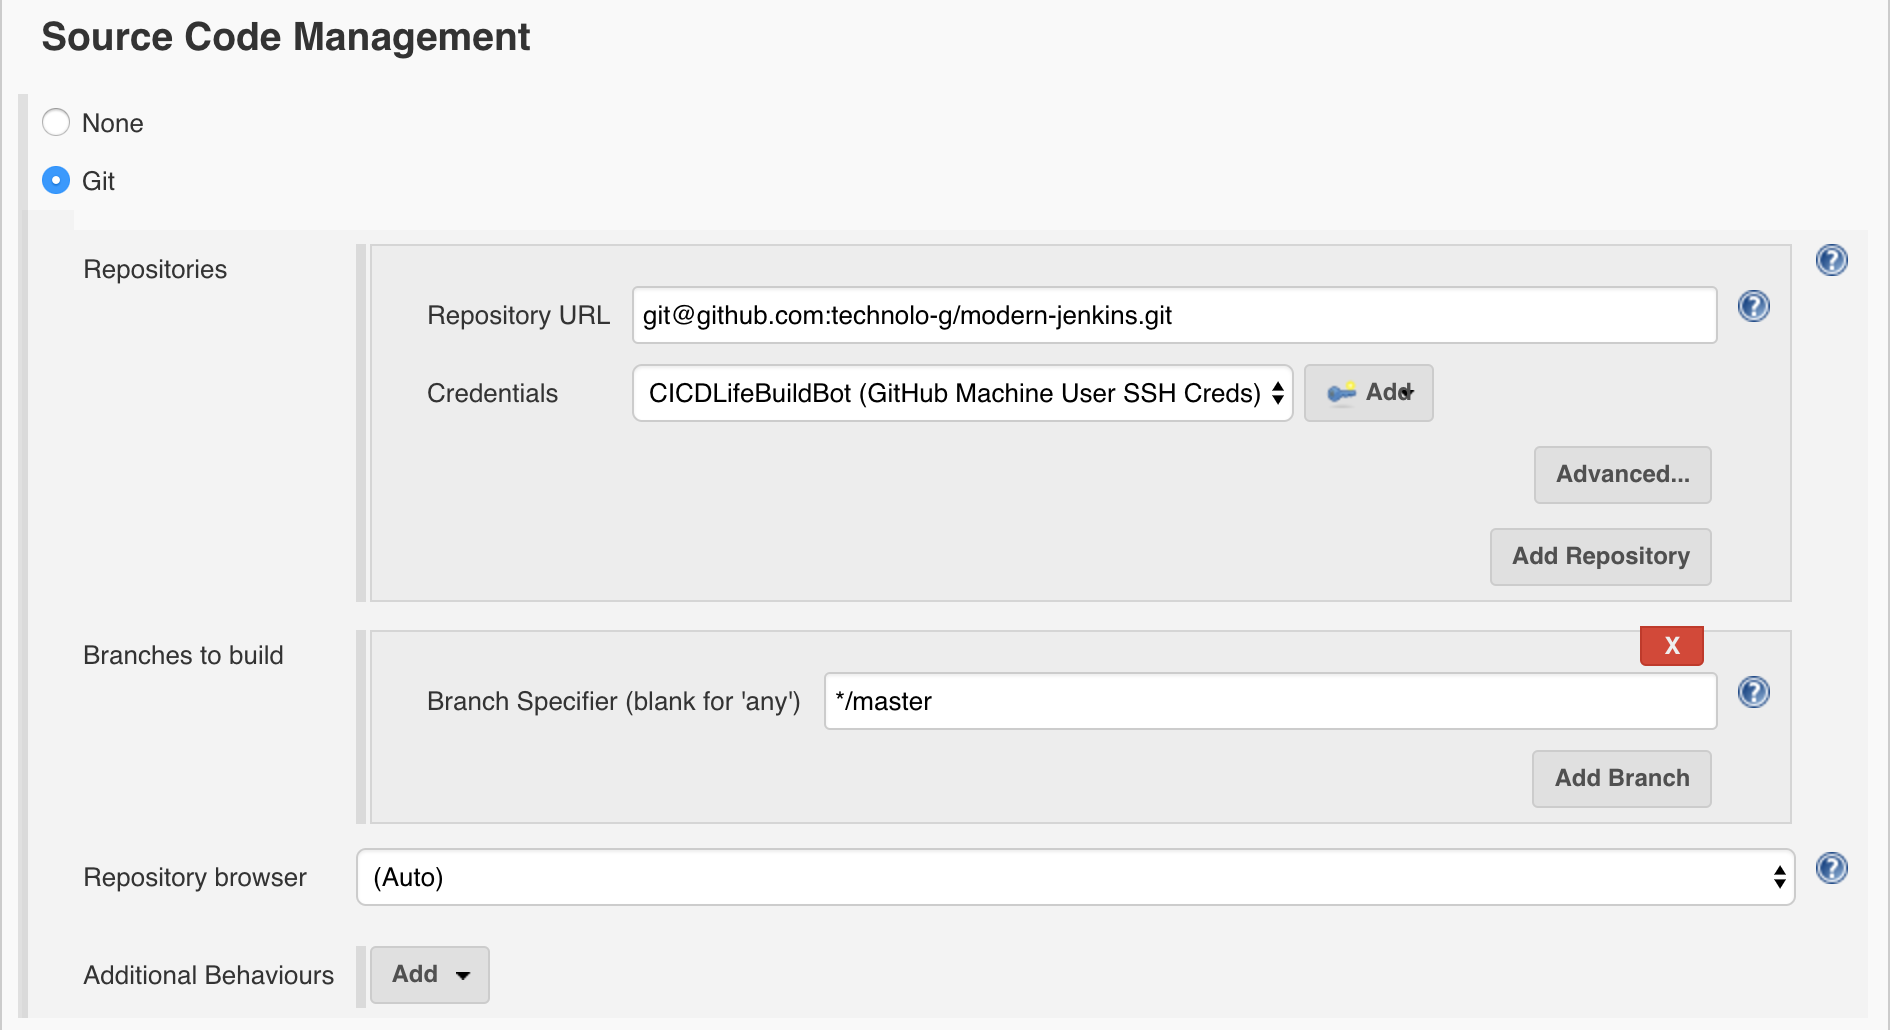
  • Under Source Code Management, select Git
  • For the Repository URL enter: git@github.com:technolo-g/modern-jenkins.git
  • For the Credentials choose GitHub Machine User SSH Creds Git Config
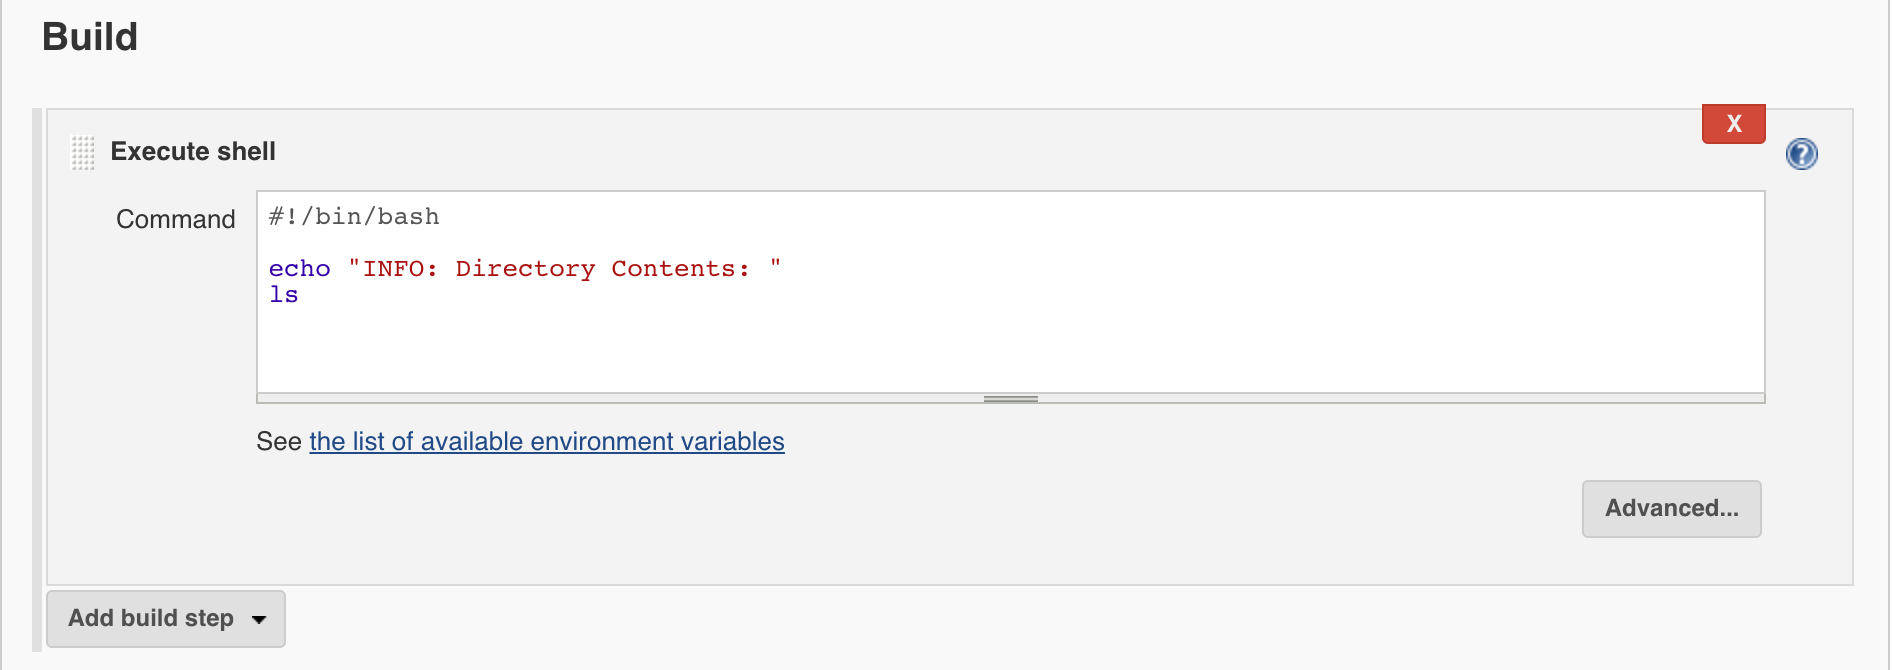
  • Scroll down to Build and add a shell step
  • Within the shell step type echo "INFO: dir contents are" && ls Shell Step
  • Save the job and run it
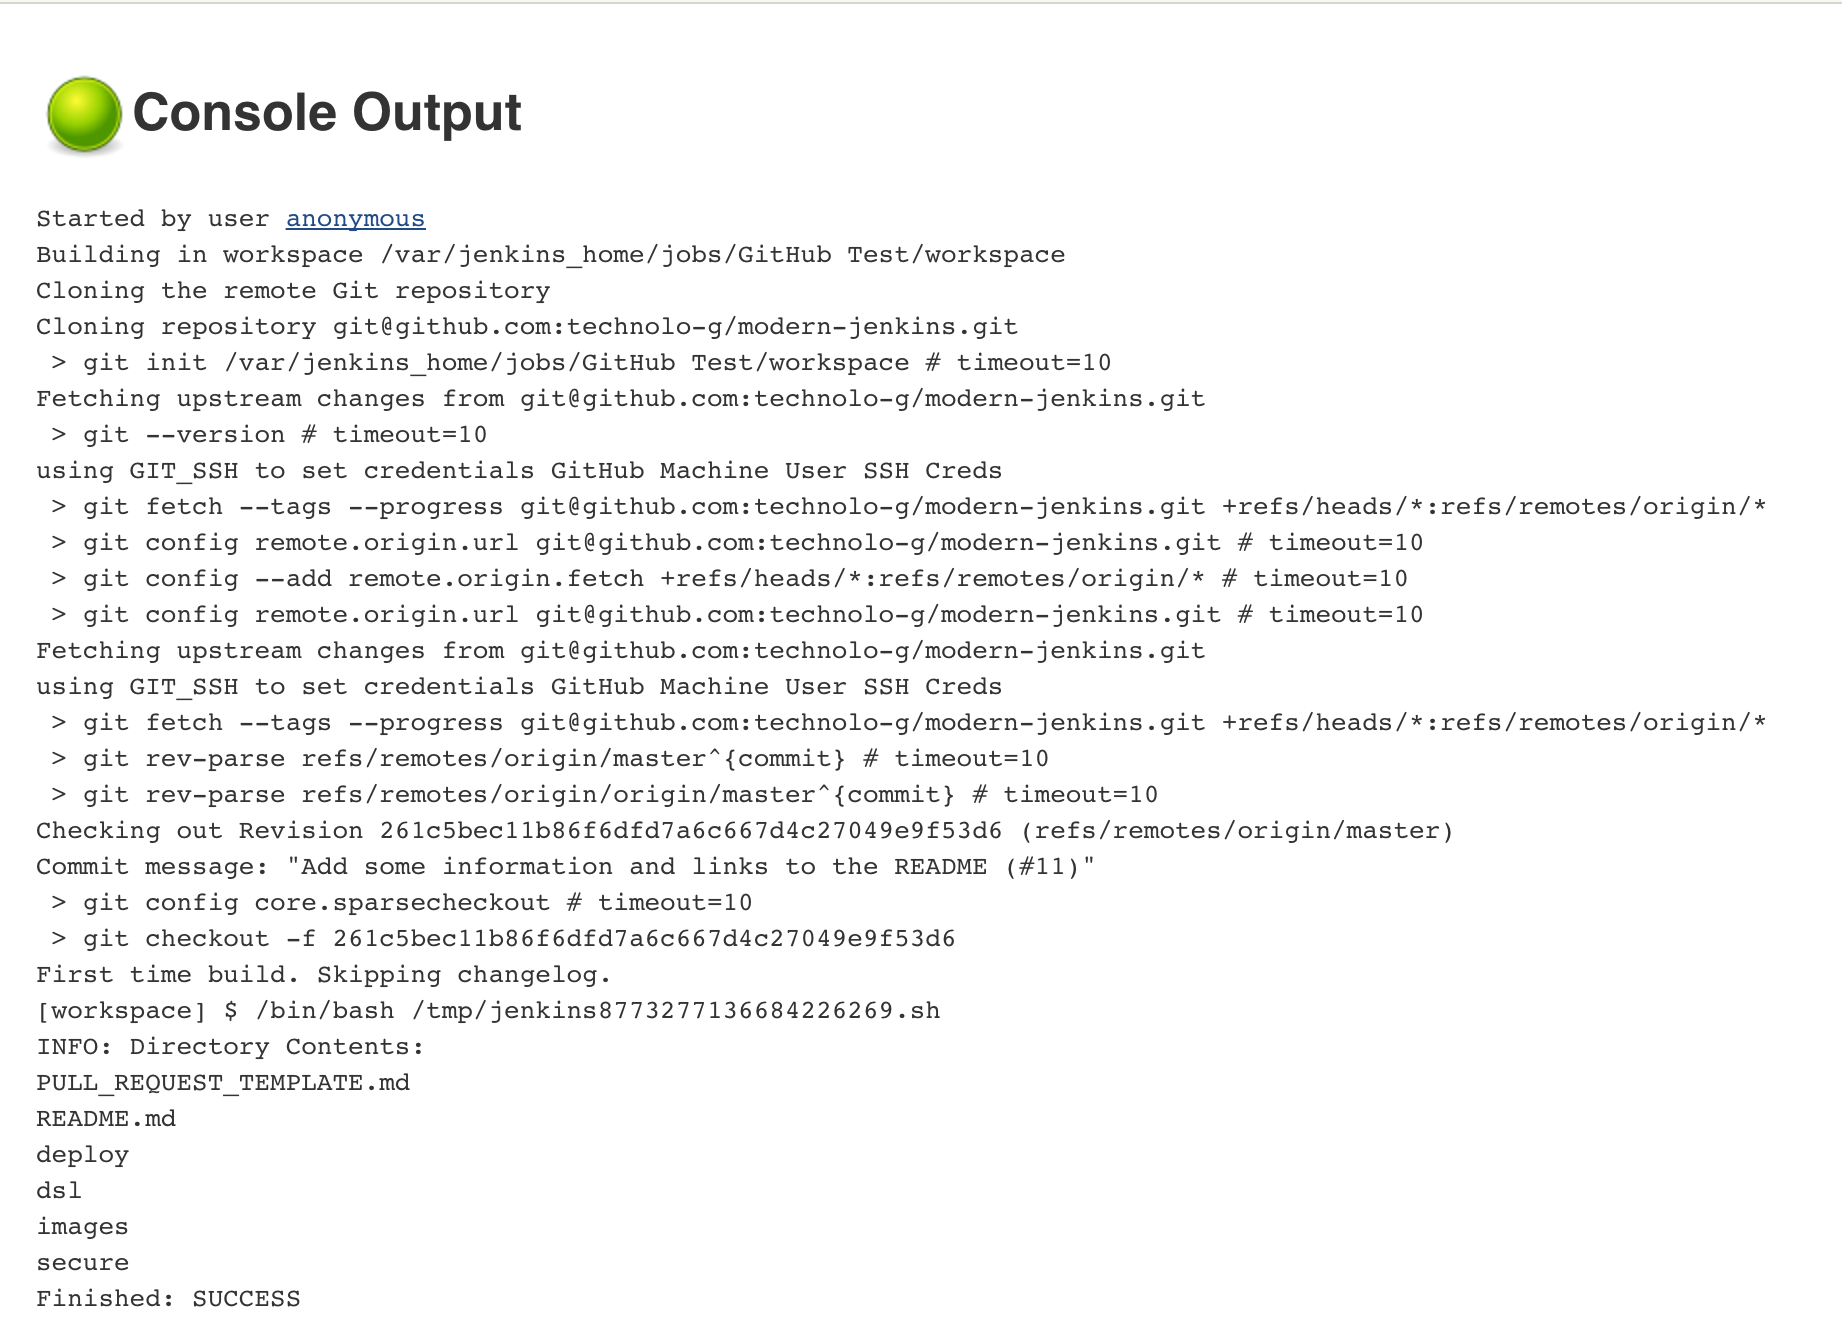
  • The job should be able to clone the repo and list the directory contents. If this is not the case, you must debug what is happening here and try to get it working again. It is critical that the changes we make in each part are working as expected. Console Out
Congratulations! You have just performed your first and certainly not last programmatic configuration of Jenkins! Give yourself a pat on the back because that was no easy feat.

Commit, Push, PR

Take extra care when pushing branches that are supposed to have encrypted secrets. Sometimes accidents happen and you want to know about them immediately. Since we have added a bunch of secrets in this branch, pay attention to make sure that all of them are encrypted and none are plaintext.

If you got wicked stuck (or even a little bit off track), take a look here to see the repo’s state at the end of this post. https://github.com/technolo-g/modern-jenkins/tree/unit3-part4

Well, we can definitely run a job now so that’s good news. The bad news is that we created it by hand (yuck!). The next installment will introduce you to a way that eliminates use of the GUI for creating jobs. I personally think it has completely changed the way CI systems are built and I would never hand create a job EVER now.

Modern Jenkins Unit 3 / Part 3: Managing Secrets in GitHub

Encrypting files in the repo with Transcrypt

Encryption

In production we will hopefully have a secrets management system, or at a very minimum private repos to store encrypted secrets in. For the purpose of this demo though I will be using a public repo and do not want to expose any sensitive data that we may need to add to this repo. WARNING: To be clear, storing any kind of secrets in a git repo, encrypted or not, may not be a good idea. Consult your local security team for advice. We however, don’t have any state secrets for this demo and very few options.

OpenSSL

Transcrypt is a shell script that uses OpenSSL to encrypt and decrypt files in your git repo that are noted in the .gitattributes file. Let’s initialize our repo and confirm that it is working.


PWD: ~/code/modern-jenkins/

# On MacOS you can use brew
brew install transcrypt

# On Linux you have to install OpenSSL then place the script in your path
yum install openssl
  
# Download the script to our PATH
wget -O /usr/local/sbin/transcrypt https://raw.githubusercontent.com/elasticdog/transcrypt/master/transcrypt
  
# Make it executable
sudo chmod +x /usr/local/sbin/transcrypt

# Confirm it works
trancrypt --help

NOTE: More information on the software can be found on the README here: https://github.com/elasticdog/transcrypt

Initialize the repo

We will initialize Transcrypt within the repo on a clean branch. This will hopefully ensure that we can configure Transcrypt prior to adding any secrets to the repo.


PWD: ~/code/modern-jenkins/

# Check out a branch and initialize transcrypt
git checkout -b chore-install_transcrypt

transcrypt
# Encrypt using which cipher? [aes-256-cbc]
# Generate a random password? [Y/n]
# 
# Repository metadata:
# 
#   GIT_WORK_TREE:  /Users/matt.bajor/code/modern-jenkins
#   GIT_DIR:        /Users/matt.bajor/code/modern-jenkins/.git
#   GIT_ATTRIBUTES: /Users/matt.bajor/code/modern-jenkins/.gitattributes
# 
# The following configuration will be saved:
# 
#   CIPHER:   aes-256-cbc
#   PASSWORD: <a really good password, trust me>
# 
# Does this look correct? [Y/n]
# 
# The repository has been successfully configured by transcrypt.

Add the generated PASSWORD to your LastPass, keychain, text document on your desktop, or wherever you store secure passwords. It is very important to not lose that passphrase.

We now want to get the .gitattributes file added up and merged in so we can test if secrets encryption is working as expected so let’s branch, commit, push and PR.


PWD: ~/code/modern-jenkins/

git add .
git commit -m "Initialize Transcrypt in the repo"
git push origin chore-install_transcrypt

# PR, review, merge and then catchup master
git checkout master
git pull
git checkout -b test-secrets

Let’s create a secrets dir and initialize it with a README to confirm that transcrypt is working as expected without potentially exposing secrets on the internet. The way transcrypt works is that it looks at the .gitattributes in the repo root for files to encrypt. If it sees that there are paths to encrypt, it will encrypt them before adding to the tree. It does still allow you to view the changes as plaintext locally which sometimes can lead to confusion as to whether or not its working.


PWD: ~/code/modern-jenkins/

# Look at the .gitattributes
cat .gitattributes
# #pattern  filter=crypt diff=crypt
  
# Echo our new pattern in there
echo 'secure/* filter=crypt diff=crypt' >> .gitattributes
  
# Confirm that the file looks good:
cat .gitattributes
# #pattern  filter=crypt diff=crypt
# secure/* filter=crypt diff=crypt 

# Add a README with a bit of info
mkdir -p secure/
echo "# Transcrypt Secrets\n\n This repo is encrypted with transcrypt" > secure/README.md

# Commit and push
git add .
git commit -m "Add test secrets"
git push origin test-secrets

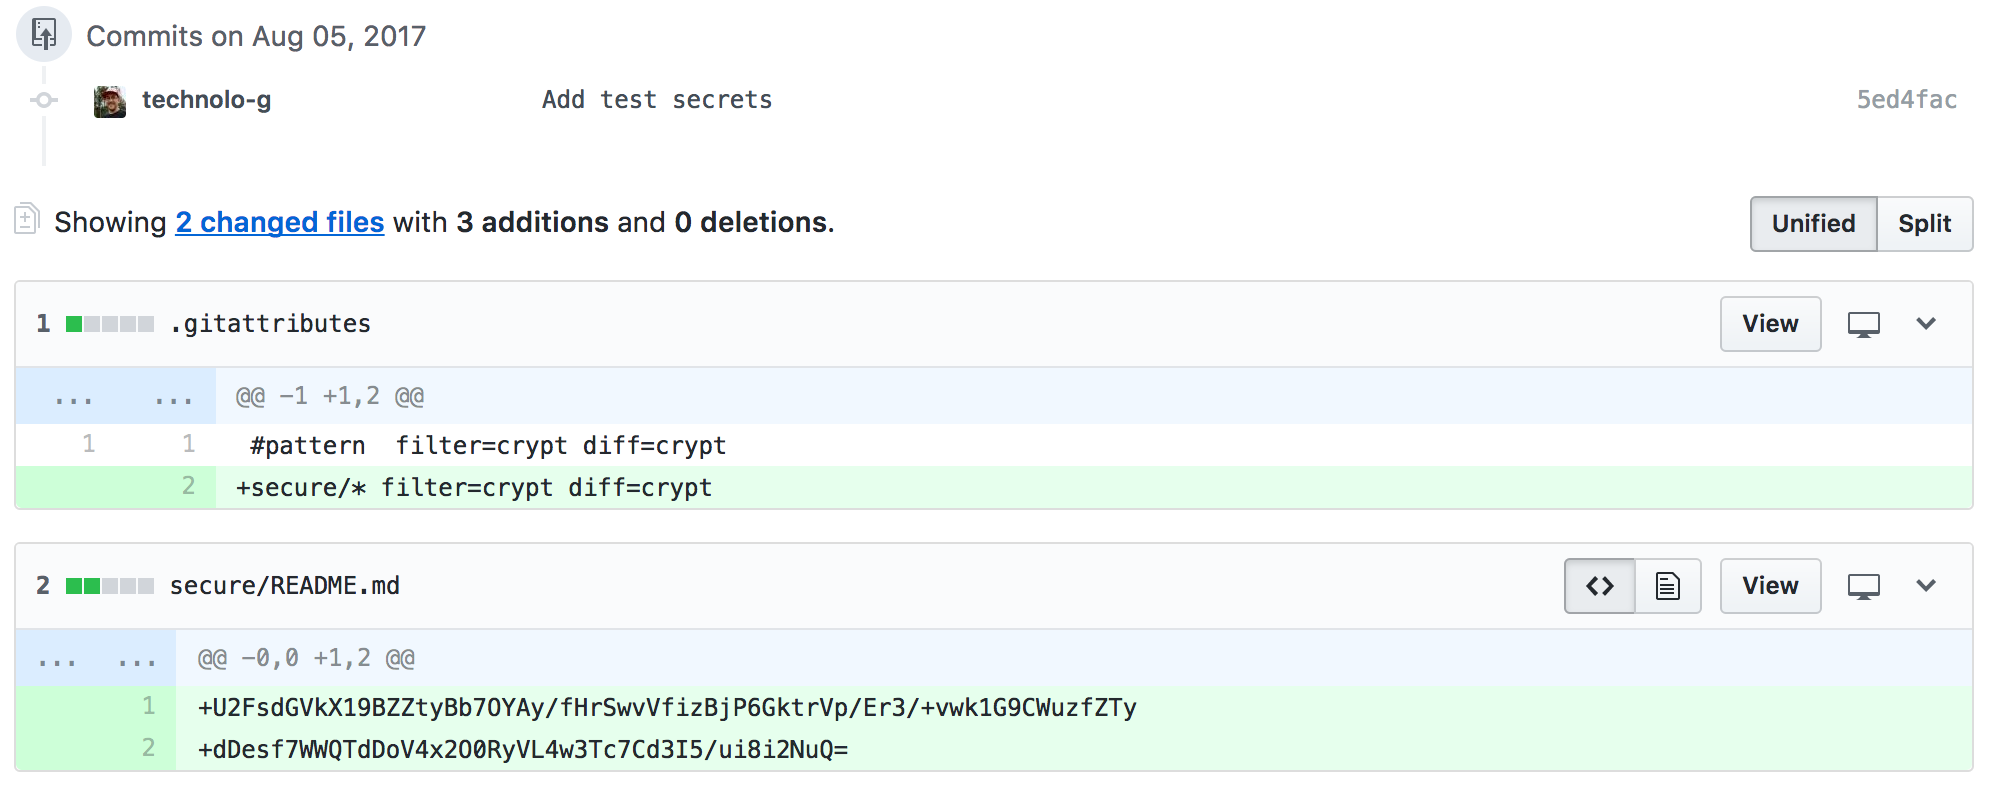
When opening the PR, you should notice that there are two files changed:

  • .gitattributes
  • secure/README.md

Transcrypt Commit

You should also notice that the contents of README.md is encrypted. If this is the case, give yourself a thumbs up, merge the PR, and update your local branch.

DangerDanger

NOTE: If you see that README.md is not encrypted, do not open the PR. Instead, delete your branch and start over. Follow the instructions on the Transcrypt site if you need more help or information. It is important to confirm that the encryption mechanism is working the way we expect before we put secrets into the repo.

Let’s take this time to add a line to the PULL_REQUEST_TEMPLATE.md file reminding us to check for unencrypted secrets:


./PULL_REQUEST_TEMPLATE.MD

...
# #### Contribution checklist
#
  - [ ] THERE ARE NO UNENCRYPTED SECRETS HERE
# - [ ] The branch is named something meaningful
# - [ ] The branch is rebased off of current master}
...

Now that the repo has been initialized with Transcrypt, we can begin adding some configuration that depends on credentials. In the next segment, we will create a machine user for GitHub and configure the Git plugin to use those credentials when cloning.

The repo from this section can be found under the unit3-part3 tag here: https://github.com/technolo-g/modern-jenkins/tree/unit3-part3

Next Post: Configuring the Jenkins GitHub plugin programmatically with Groovy

Modern Jenkins Unit 3 / Part 2: Configure Jenkins URL

Configuring the Jenkins URL

Configure Jenkins URL with Groovy

Currently it just so happens that the Jenkins URL in the management console does have the proper config as it is set to http://localhost:8080. This is merely a coincidence that the default value and the current address match though. Once we start moving this thing around, it will be very important that it is set to the right value else we’ll have all kinds of strange issues. Since it will definitely have to be configured, let’s start here. It doesn’t hurt that it is a fairly simple example of configuring Jenkins with an environment variable passed by Docker Compose.

Passing from Docker Compose

This is a setting that will change from environment to environment and so I think the best place to set it is in the compose file. Let’s create a variable in there that we can read it in during init and make the right configuration. Edit the compose file and create a JENKINS_UI_URL env variable as well as volumes for the configs themselves.


deploy/master/docker-compose.yml

#---
## deploy/master/docker-compose.yml
## Define the version of the compose file we're using
#version: '3.3'
#
## Define our services
#services:
#  # Jenkins master's configuration
#  master:
#    image: modernjenkins/jenkins-master
#    ports:
#      - "8080:8080"
     environment:
        - JENKINS_UI_URL=http://localhost:8080
#    volumes:
#      - plugins:/usr/share/jenkins/ref/plugins
#      - warfile:/usr/share/jenkins/ref/warfile
       - groovy:/var/jenkins_home/init.groovy.d
#
#  # Jenkins plugins' configuration
#  plugins:
#    image: modernjenkins/jenkins-plugins
#    volumes:
#      - plugins:/usr/share/jenkins/ref/plugins
#      - warfile:/usr/share/jenkins/ref/warfile
       - groovy:/usr/share/jenkins/ref/init.groovy.d
#
## Define named volumes. These are what we use to share the data from one
## container to another, thereby making our jenkins.war and plugins available
#volumes:
#  plugins:
#  warfile:
   groovy:
#

Now that it is set, we should be able to write a groovy init script to read it. But first, we will have to restart Jenkins to pick up the new environment:


PWD: ~/code/modern-jenkins

cd deploy/master
docker-compose down -v
docker-compose up -d

# Confirm that the variable is there:
docker inspect master_master_1 | grep JENKINS_UI

# Should output
# "JENKINS_UI_URL=http://localhost:8080",

With the environment variable now being available to us, we can use the script console at localhost to develop our script that will set the URL of our Jenkins instance.


URL: http://localhost:8080/script

images/jenkins-plugins/files/init.groovy.d/01-cofigure-jenkins-url.groovy

import jenkins.model.*

// Read the environment variable
url = System.env.JENKINS_UI_URL

// Get the config from our running instance
urlConfig = JenkinsLocationConfiguration.get()

// Set the config to be the value of the env var
urlConfig.setUrl(url)

// Save the configuration
urlConfig.save()

// Print the results
println("Jenkins URL Set to " + url)

This should output:

URL Output

Deploying our Groovy Jenkins Configs

We now have a working script that will manage the URL of Jenkins in any environment that we would be deploying into simply by setting a variable in the compose file. Now we need to make this available to the master so that it can be executed on startup. To do that, we will add a director to the plugins image and then mount it into the master in a similar way to how the war and plugins work.


PWD: ~/code/modern-jenkins/

cd images/jenkins-plugins
mkdir -p files/init.groovy.d/

# Add the file above to this directory as
# files/init.groovy.d/01-cofigure-jenkins-url.groovy

Add the full directory (instead of the individual scripts) of Groovy configuration to the Docker image and then export it as a volume.


images/jenkins-plugins/Dockerfile

...
#  # Install our base set of plugins and their dependencies that are listed in
#  # plugins.txt
#  ADD files/plugins.txt /tmp/plugins-main.txt
#  RUN install-plugins.sh `cat /tmp/plugins-main.txt`
#
   # Add our groovy init files
   ADD files/init.groovy.d /usr/share/jenkins/ref/init.groovy.d
#
...

#  # Export our war and plugin set as volumes
#  VOLUME /usr/share/jenkins/ref/plugins
#  VOLUME /usr/share/jenkins/ref/warfile
   VOLUME /usr/share/jenkins/ref/init.groovy.d
#
#  ...

We can now rebuild the image and pick up our new config that should (hopefully) configure the URL of our Jenkins on boot!


PWD: ~/code/modern-jenkins

./images/jenkins-plugins/build.sh

cd deploy/master/
docker-compose down -v
docker system prune -f
docker-compose up -d
docker-compose logs -f

Ok you should now see that the URL in the Jenkins management console is set to http://localhost:8080! Ahhhh, it was like that before? Hmm. Ok well then let’s break it to confirm it is working. Modify the value in the compose file to something different and restart Jenkins:


PWD: ~/code/modern-jenkins/deploy/master

# Change the JENKINS_UI_URL to something different in docker-compose.yml
perl -pi -e 's/JENKINS_UI_URL=.*/JENKINS_UI_URL=http:\/\/derpyhooves/g' docker-compose.yml

# Restart the stack
docker-compose down -v
docker-compose up -d
docker-compos logs

Homer Fatfinger

Did that work? A typo you say? I can’t imagine it. I’ve typed docker-compose over 1000 times today, it’s not possible for me to misspell it. In addition, if you notice the difference between this set of commands and the one earlier, we seem to be drifting to chaos. Let’s take note of that, but address it after we confirm that this current change is working as expected.

Gooood, it does work :) The URL in the management console has been updated to the new, wrong, custom value so we can confirm it works. Let’s commit our code now, but attend to that tiny little pile of tech debt we found (starting and stopping the system differently every time is definitely tech debt). NOTE: Don’t forget to set the JENKINS_UI_URL back to http://localhost:8080


PWD: ~/code/modern-jenkins/

git checkout -b feat-configure_jenkins_url
git add .
git commit -m "Configure the Jenkins URL with Groovy

This change adds an environment variable to the compose file
that sets the URL of the Jenkins instance upon boot. This is
done via the script added to init.groovy.d"

Squirrel!

Squirrel

So we’ve noticed something a bit stinky in our code as we’ve been going about our business. This happens very often in our work lives and attending to little tech debts like this is critical to having quality software. I certainly encourage everyone to leave the code better than they found it and to refactor things when they see something turning into a turd like object.

I also encourage you to make note of these things and take care of them after you are in a place to save game. Switching context between one problem and another can be very expensive mind and time wise so feel free to take a note, create a ticket or something, then finish what you are doing (unless there is an actual issue that needs to be addressed before your code will work). When you submit your PR for review, then jump on that Jira and refactor your heart away.

We need to do everything, but we can only do one thing at a time. Try to be aware of time management.

Let’s get that squirrel

What we noticed was that we were beginning to type the command differently every time we did it. That seems like it should be replaced by a shell script. Let’s create a start script so that this thing starts consistently every time:


deploy/master/start.sh

#!/bin/bash -el

echo "INFO: (re)Starting Jenkins"
docker-compose down -v
docker-compose up -d

echo "INFO: Use the following command to watch the logs: "
echo "docker-compose logs -f"

Write that guy out to deploy/master/start.sh and make it executable with chmod +x deploy/master/start.sh and we’ve now got ourselves a script that will consistently restart our app.

Add that onto the branch with a good message and push, PR, merge, etc.. See, you’re getting the hang of it!

Next let’s get ready to handle some secrets. Shhhhhh!

The repo from this section can be found under the unit3-part2 tag here: https://github.com/technolo-g/modern-jenkins/tree/unit3-part2

Next Post: Managing Jenkins secrets in GitHub with Transcrypt