

Setting up the Jenkins <–> Git Interactions
One task that just about every build system needs to complete before doing anything is getting the code that it will be testing and packaging. For most software development shops in the world, this code is kept in a source code repository in a version control system (VCS). The most common implementation that I have been exposed to is Git. Linus Torvalds with a few kernel developers wrote the initial version of git while working on the kernel after BitKeeper’s copyright holder revoked free use1. Git is what powers GitHub (surprise, surprise) and is just about the most popular VCS out there. We are even using it to develop our Jenkins CI system!
In order to interact with GitHub, we are going to need a couple of things setup:

- A machine user that can be managed independently of your customers
- A SSH key secret in the credentials store
- Configuration that says to use the credentials in the store for cloning
Once we have these in place we should be able to create a job that clones a repo and does something.
Creating a machine user
Teams of developers change constantly with people being added and removed from the roster quite frequently. To use credentials that are tied to a person is not good practice as it does not separate the actions of the user and the actions of the system. For this reason we will create our own machine user in GitHub and configure her to do the builds.
Note: Do not stage or commit anything during this step. We will be encrypting the sensitive files in the next step.
-
Browse to http://github.com/ in an Incognito window (we need to create a new account and you’re probably logged in).
-
Create an account for your machine user. It is not against GitHub’s T.O.S.2 to create a machine user, but it is to script this process. You can’t reuse your existing email, so you must have a secondary email setup for this user.
-
Verify the email and then browse to Settings in the upper right hand corner.
-
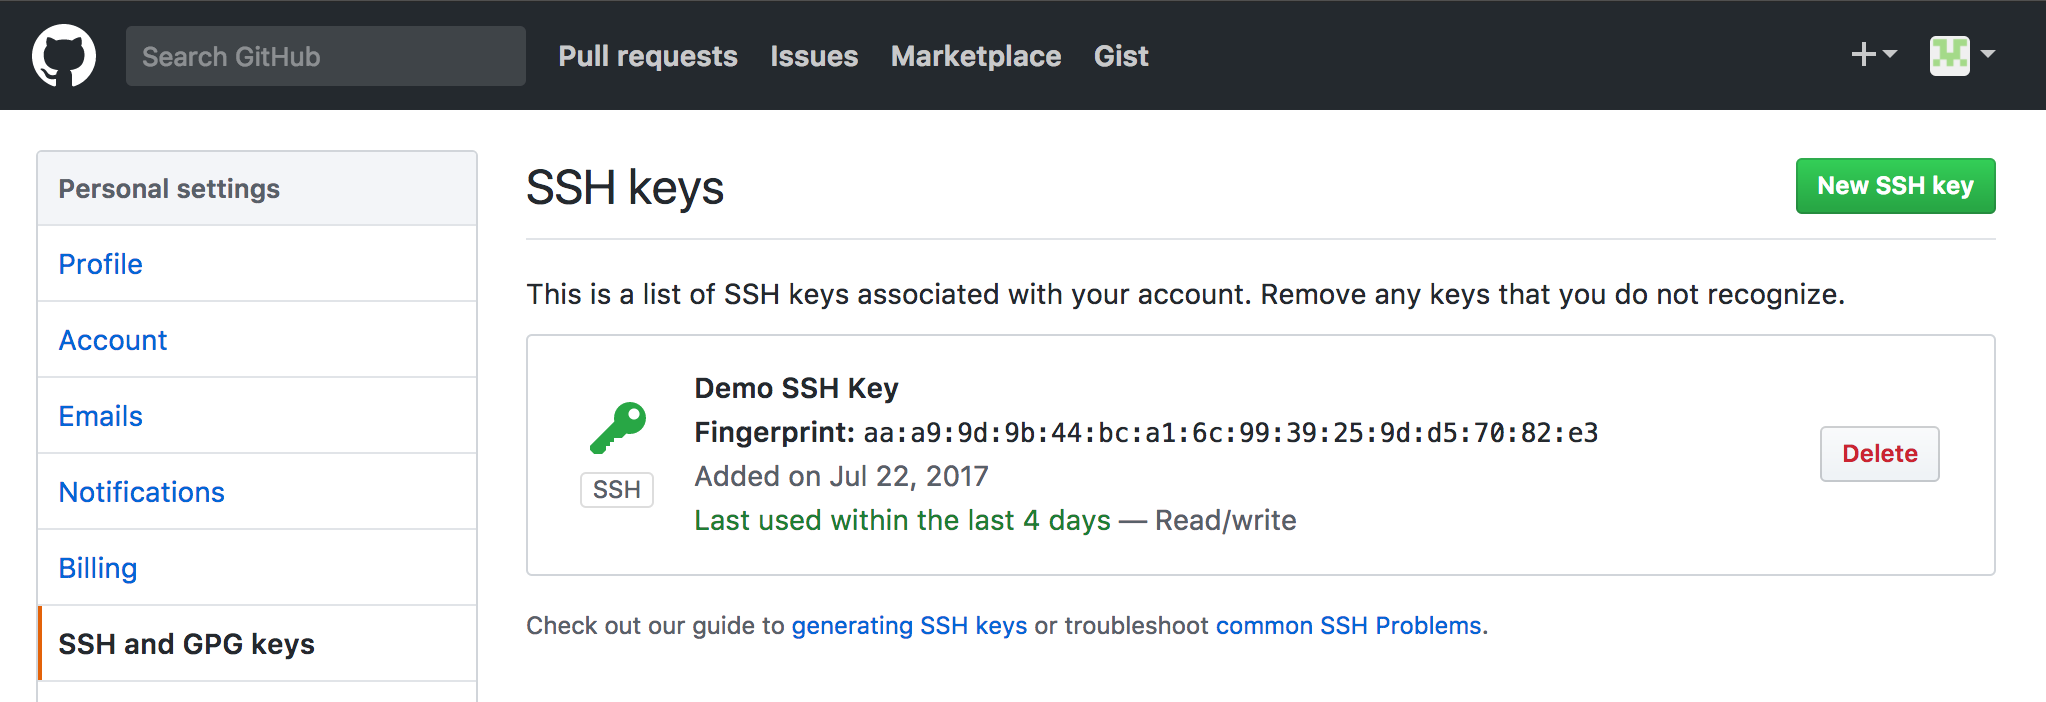
Fill out the info that makes sense and then head over to SSH and GPG Keys
-
We now need to create an ssh-key for the machine user. We will use a new type of key based on this article: https://blog.g3rt.nl/upgrade-your-ssh-keys.html
PWD: ~/code/modern-jenkins/
# cd into our secrets dir
cd secure

# Generate a ed25519 key in the new RFC4716 format with a random good passphrase.
# Something like: 't0$VQki3RWVim!K*rzA1' and then make sure to note the pw. We
# will be using it in a moment
ssh-keygen -o -a 100 -t ed25519 -f git-ssh-key.priv

# Rename the pubkey
mv git-ssh-key.priv.pub git-ssh-key.pub

# Record that passphrase we used to generate the key in secure/git-ssh-key.pw
vi git-ssh-key.pw

# Record the GitHub username for the user in git-ssh-key.user
echo "CICDLifeBuildBot" > git-ssh-key.user- Now add the contents of
git-ssh-key.pubto the SSH Keys in your GitHub Settings page with a good name. We now have a machine user and need to configure Jenkins to use it.
Add the secrets to the credential store

Now that we have the Git credentials that should in theory work for cloning and pushing we need to get them added into the Jenkins credential store. How we will do this is via the init system Groovy and some Docker volume mounts.
Mount the secrets into the master container
Since we are still in development, let’s just add our secure dir to the compose file as a mount. When we get to prod we will change this up.
deploy/master/docker-compose.yml
...
#  # Jenkins master's configuration
#  master:
#    image: mastering-jenkins/jenkins-master
#    ports:
#      - "8080:8080"
#    volumes:
#      - plugins:/usr/share/jenkins/ref/plugins
#      - warfile:/usr/share/jenkins/ref/warfile
       - ${PWD}/../../secure:/secure:ro
#
#  # Jenkins plugins configuration
#  plugins:
...
Restart the service using our script
PWD: ~/code/modern-jenkins/deploy/master
# Restart
./start.sh

# Confirm that the files have been mounted where we expect
docker exec -t master_master_1 ls /secure
#README.md  git-ssh-key.priv  git-ssh-key.pub  git-ssh-key.pw  git-ssh-key.user
Restarting the master will mount the directory ~/code/modern-jenkins/secure at
/secure inside the container. Since we specified ro at the end of the VOLUME
definition, the secrets themselves will be read-only. With the secrets loaded
into the environment, we can begin developing a script that configures GitHub.
Writing Groovy to configure GitHub
Configuring Jenkins plugins with Groovy can seem to be more like an art than a science. Each plugin operates a little bit differently and since Jenkins has been so popular for so long, plugins are in all different states of repair. The basic gist of how to do any plugin is:
- Read the values in from the filesystem or ENV that you need to configure
- Get a handle on the configuration object for the plugin
- Create a new instance of the configuration objects with the values you want
- Update the main configuration with your newly created one
- Save the config object
Any plugin can be configured this way and it’s normally a matter of familiarizing yourself with the plugin’s data models + classes enough to create what you need. Let’s take a look at the (well documented) Groovy script that configures our GitHub plugin.
URL: http://localhost:8080/script
images/jenkins-plugins/files/init.groovy.d/02-configure-github-client.groovy
// 02-configure-git-client.groovy
// Thanks to chrish:
// https://stackoverflow.com/questions/33613868/how-to-store-secret-text-or-file-using-groovy
import jenkins.model.*
import com.cloudbees.jenkins.plugins.sshcredentials.impl.*
import com.cloudbees.plugins.credentials.domains.*;
import com.cloudbees.plugins.credentials.*;


// Read our values into strings from the volume mount
privKeyText = new File('/secure/git-ssh-key.priv').text.trim()
passPhraseText = new File('/secure/git-ssh-key.pw').text.trim()
sshUserText = new File('/secure/git-ssh-key.user').text.trim()

// Get a handle on our Jenkins instance
def jenkins = Jenkins.getInstance()

// Define the security domain. We're making these global but they can also
// be configured in a more restrictive manner. More on that later
def domain = Domain.global()

// Get our existing Credentials Store
def store = jenkins.getExtensionList(
  'com.cloudbees.plugins.credentials.SystemCredentialsProvider'
  )[0].getStore()

// Create a new BasicSSHUserPrivateKey object with our values
gitHubSSHKey = new BasicSSHUserPrivateKey(
  CredentialsScope.GLOBAL,
  "git-ssh-key",
  sshUserText,
  new BasicSSHUserPrivateKey.DirectEntryPrivateKeySource(privKeyText),
  passPhraseText,
  "GitHub Machine User SSH Creds"
)

// Add the new object to the credentials store
store.addCredentials(domain, gitHubSSHKey)

// Get the config descriptor for the overall Git config
def desc = jenkins.getDescriptor("hudson.plugins.git.GitSCM")

// Set the username and email for git interactions
desc.setGlobalConfigName("${sshUserText}")
desc.setGlobalConfigEmail("${sshUserText}@cicd.life")

// Save the descriptor
desc.save()

// Echo out (or log if you like) that we've done something
println("INFO: GitHub Credentials and Configuration complete!")
If things are setup and working right, you should see our INFO statement printed
out below the console. To confirm it worked, browse to the credentials store
confirm that we now have a SSH Key secret with the id of git-ssh-key. If you
click on “Update” you should see the SSH key (don’t worry, it is armored and you
can’t show the passphrase from here). While this is not 100% secure, it is still
much better than baking the credentials into the image or a lot of other methods
people use to expose secrets. Incremental improvements are what I always say!
Add the groovy to the Docker image
After confirming that the script works, add it to the plugins Docker image by
dropping it in images/jenkins-plugins/files/init.groovy.d with the name of
02-configure-github-client.groovy. Then you can rebuild the image and restart
the service to verify that everything is working on boot.
PWD: ~/code/modern-jenkins/
# Create images/jenkins-plugins/files/init.groovy.d/02-configure-github-client.groovy
# with the content from the script console.

# Build the image
./images/jenkins-plugins/build.sh

# Restart the service
cd deploy/master
./start.sh
docker-compose logs -f
Watch the log output from the containers to confirm that the scripts are running (the name of the scripts is output in the console out) and that there are no stack traces or other unexpected errors. When the system is fully up and running, browse to the GUI and check to see if the credential has been installed. I think you’ll be pleasantly surprised!
Testing our changes
We should in theory be able to test our changes by creating a tiny little job that just clones a repo. Follow me and we’ll give it a run for it’s money:
- Browse to http://localhost:8080
- Click New Item in the top left
- Name it what you like, select freestyle project, and click OK. This will drop you at the configuration screen.
- Under
Source Code Management, selectGit - For the
Repository URLenter:git@github.com:technolo-g/modern-jenkins.git - For the
CredentialschooseGitHub Machine User SSH Creds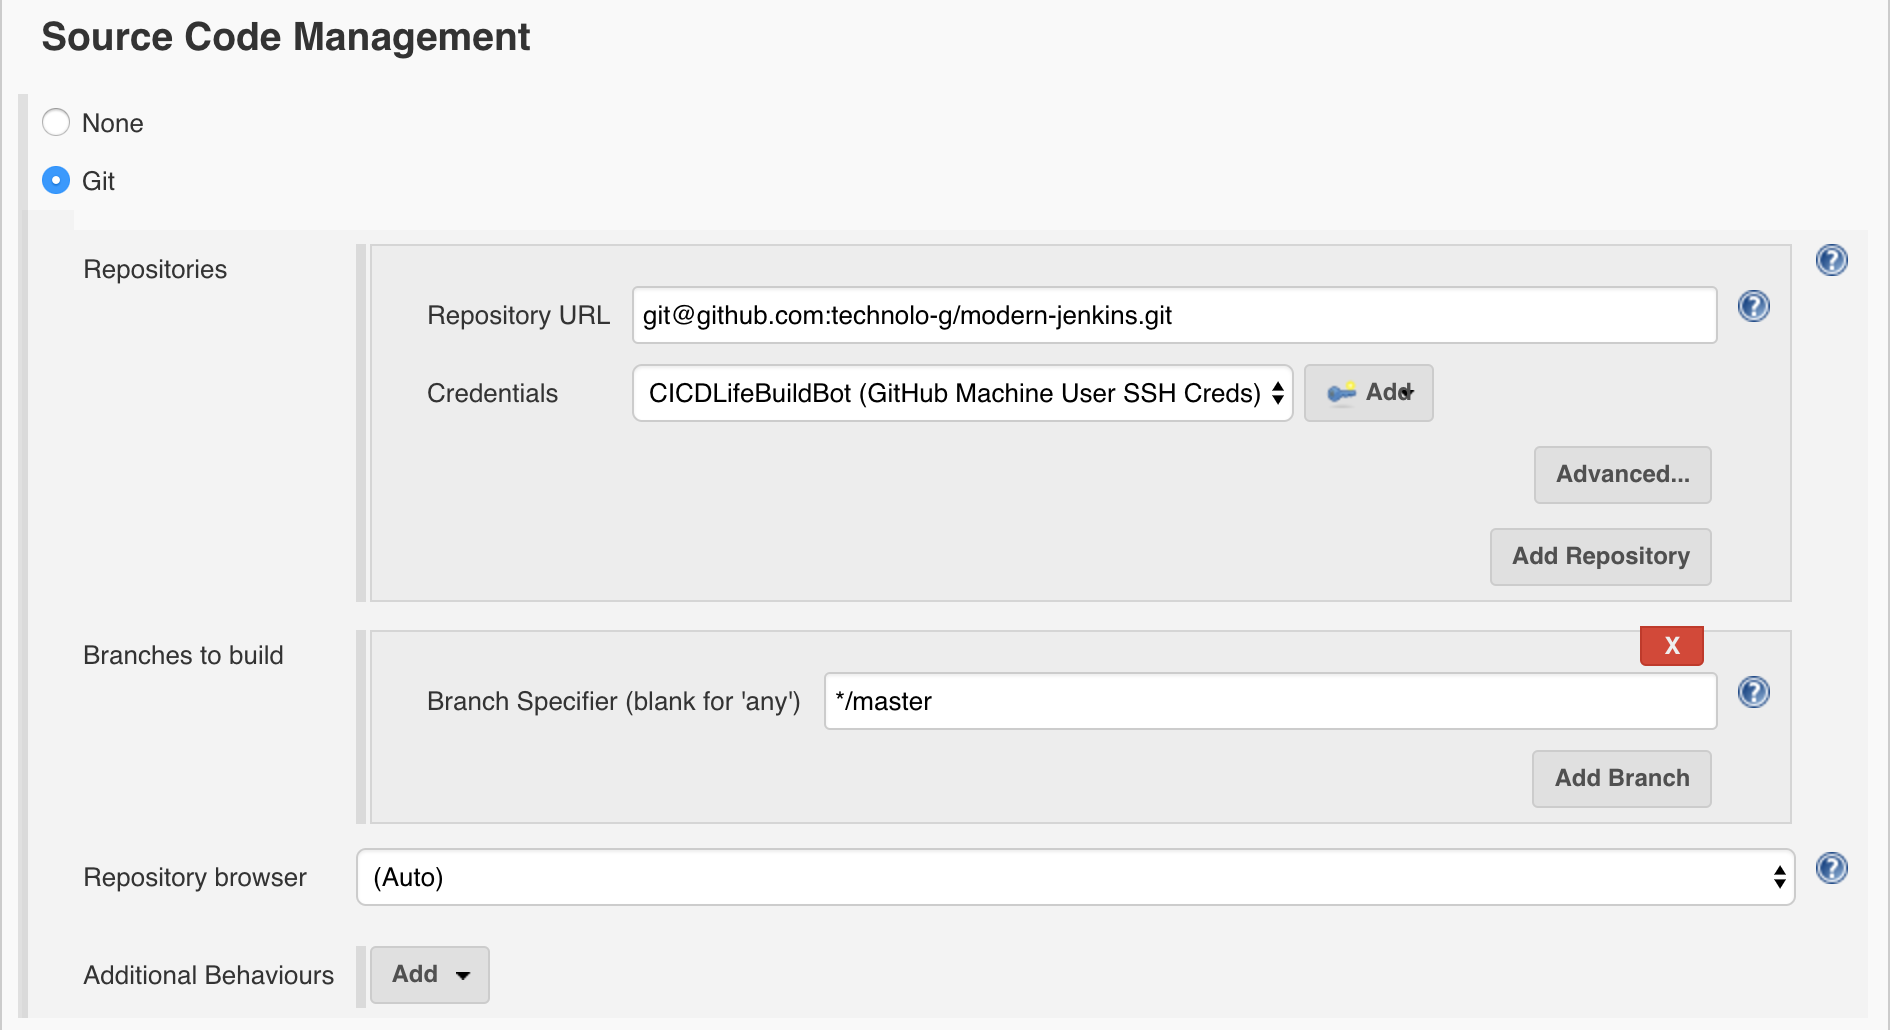
- Scroll down to
Buildand add a shell step - Within the shell step type
echo "INFO: dir contents are" && ls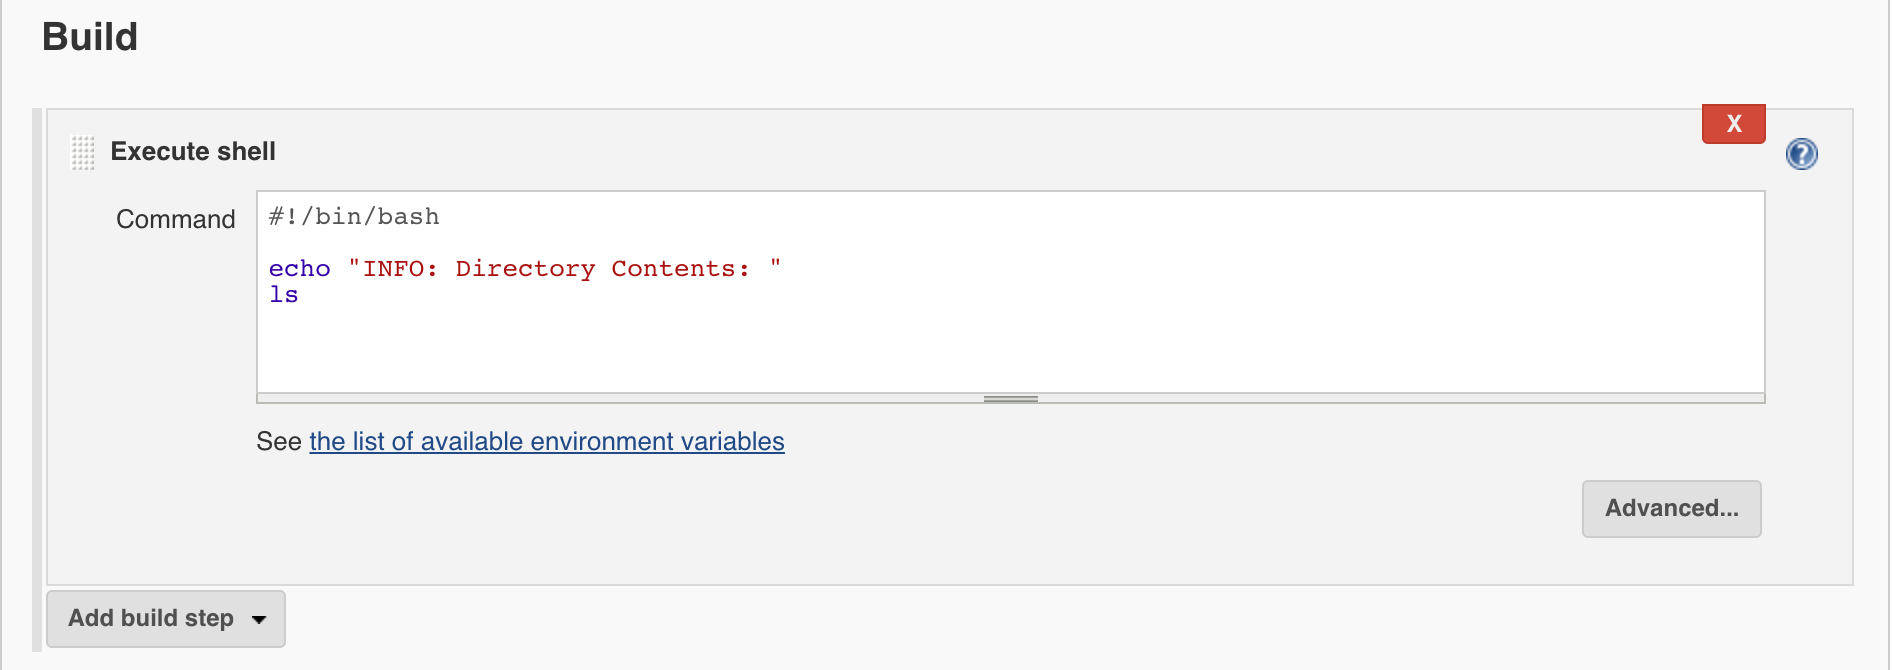
- Save the job and run it
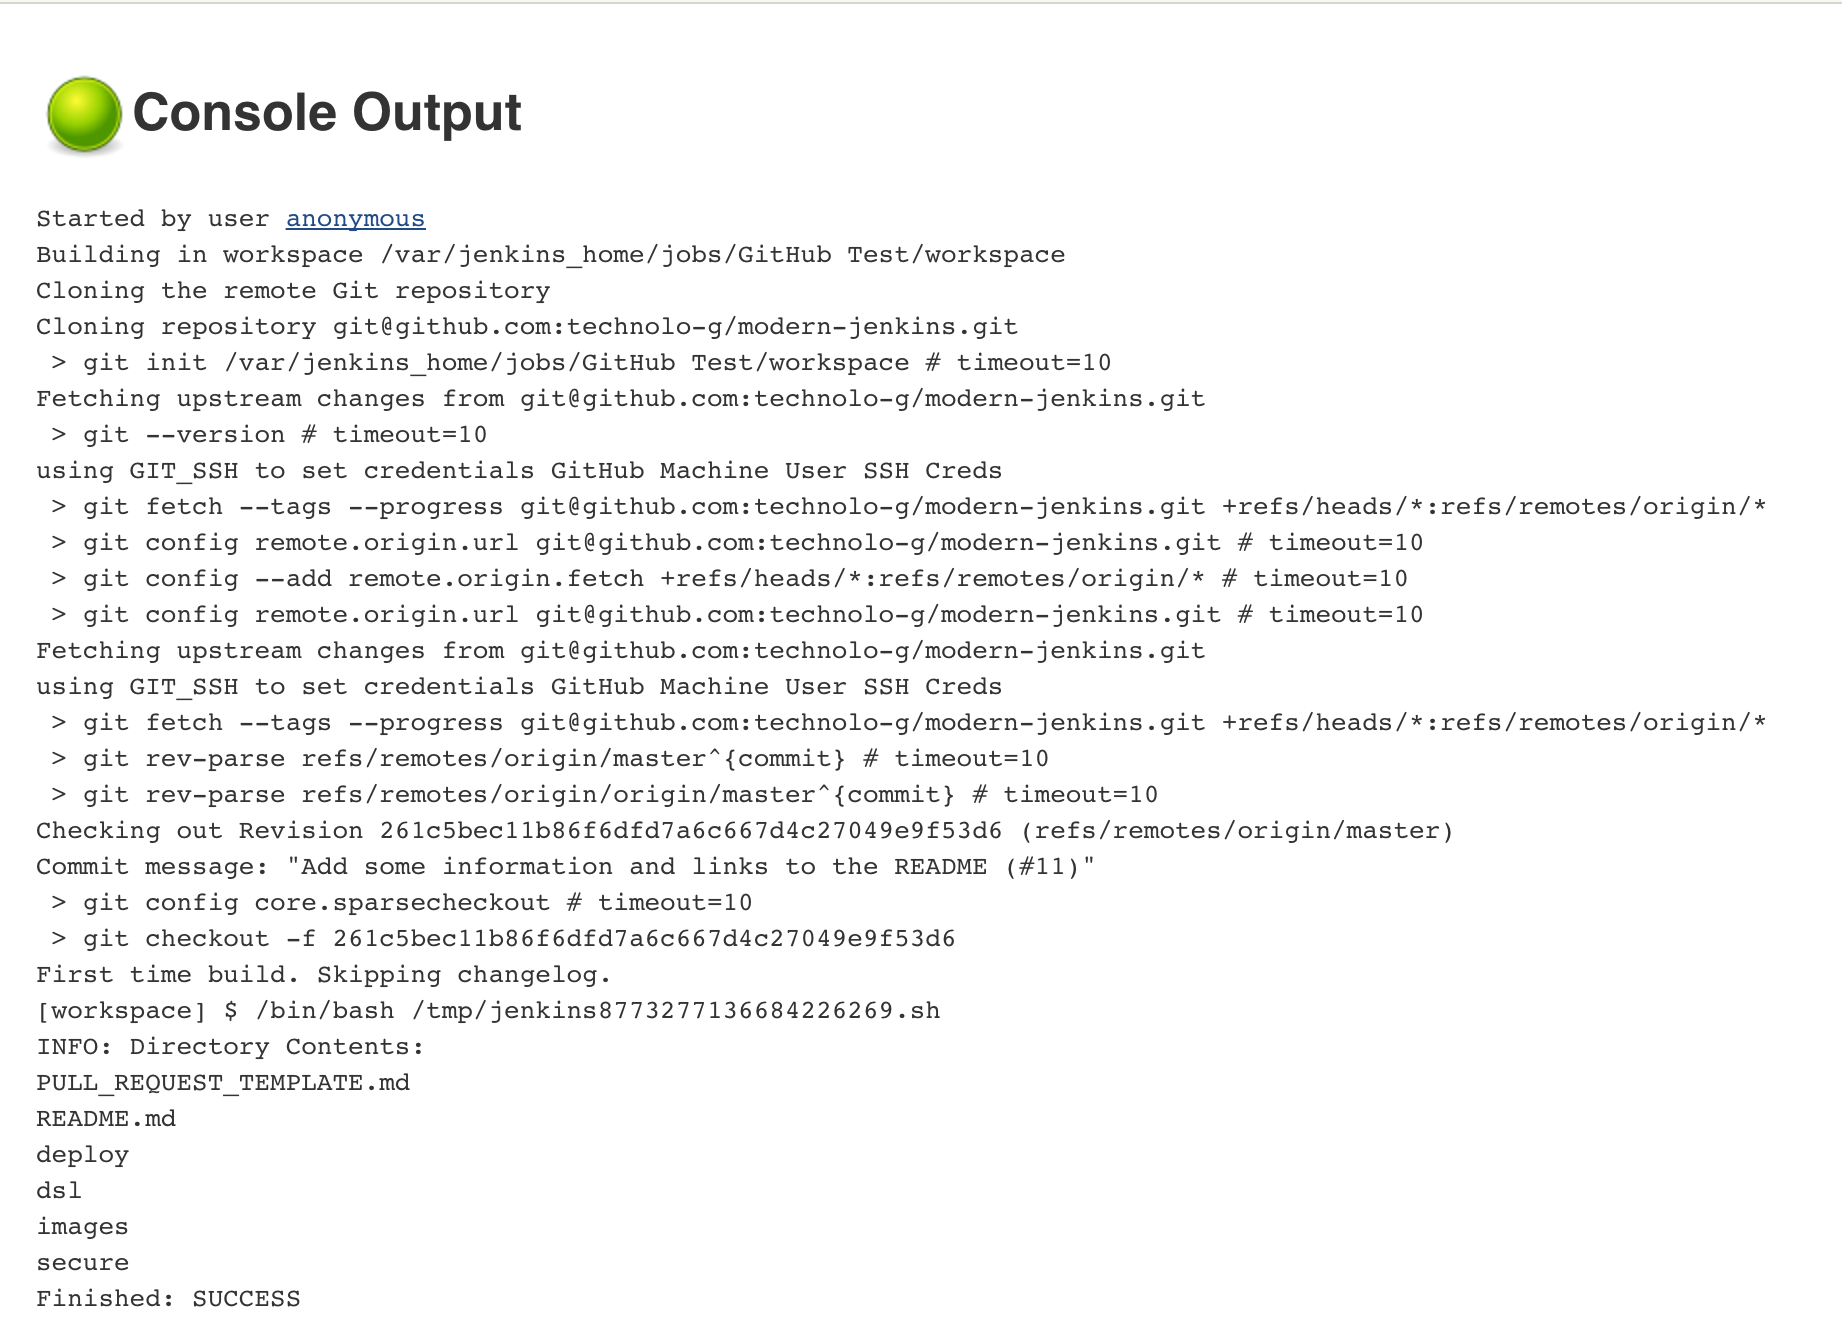
- The job should be able to clone the repo and list the directory contents. If
this is not the case, you must debug what is happening here and try to get it
working again. It is critical that the changes we make in each part are
working as expected.
Congratulations! You have just performed your first and certainly not last programmatic configuration of Jenkins! Give yourself a pat on the back because that was no easy feat.
Commit, Push, PR
Take extra care when pushing branches that are supposed to have encrypted secrets. Sometimes accidents happen and you want to know about them immediately. Since we have added a bunch of secrets in this branch, pay attention to make sure that all of them are encrypted and none are plaintext.
If you got wicked stuck (or even a little bit off track), take a look here to see the repo’s state at the end of this post. https://github.com/technolo-g/modern-jenkins/tree/unit3-part4
Well, we can definitely run a job now so that’s good news. The bad news is that we created it by hand (yuck!). The next installment will introduce you to a way that eliminates use of the GUI for creating jobs. I personally think it has completely changed the way CI systems are built and I would never hand create a job EVER now.